Blog

  • Hello, it’s me.

    Hello, it’s me.

    Did you start singing Todd Rundgren’s Hello It’s Me when you read that post title? I hope you did. Isn’t it such a great song? Big thanks to the Sex and the City Reboot, And Just Like That for reminding me of how much I loved that song. Have you watched it yet? If not, I suggest you get on it. Better yet, I suggest you start with the original series, followed by both movies and then watch the reboot. That’s what we did and it was just magical watching it all again.

    So anywho, hi friends. Been a minute, huh? It’s only been one year and four months since I’ve written a post. I know, pathetic, right? So what happened? Life. You know how it goes. It’s funny because about a year or so after my daughter was born, I realized that when people asked how we were, my answer was consistently “busy.” I realized busy was our new normal. And then I bought a building, opened a store, started an AirBnB, bought another building, working on a new store and well that took “busy” to a whole other level. So, what got put on the backburner? This blog. I’ve told myself for months that I need to dedicate one day a week to this little piece of the internets, but has that happened? Nope, not until today. And why did it probably happen today? Well, because about four weeks ago I broke my leg.

    And since I seem to insist on going over the top in just about everything, my first broken bone was no exception. Two plates and 14 screws later, I’m in a boot for quite a while and non-weight bearing on that leg for at least a few more weeks. And how did this happen? I was going to feed cattle, the wind caught a gate I was going to close and instead of just walking to the gate (like a normal person), I decided to do some sort of little jog/shuffle/who in the hell knows, slid wrong and boom, leg broken. But as I told my aunt while we were sitting in the ER, what this really was was a “Jenna Needs to Slow Her Ass Down Accident.” I was going a hundred miles an hour that morning with a long list of things I was hell bent on checking off and the good Lord decided he was going to teach me a lesson about slowing my ass down. And he did. Lesson learned. And you know what happened? You find out that the lists will still be there to check off tomorrow and most importantly, just how many people are in your corner and will come to your rescue. My girls at Local Depot have taken care of anything and everything there. My aunt has deemed herself the AirBnB manager and both her and Grunt have taken care of countless other things having to do with Local Depot and the new store we were working on when all this happened. Not to mention, getting me anything I could ever need. And the Circus went into full nurse mode, taking care of whatever I needed and getting real pissed when her Dad doesn’t put my meds back beside the labels she made to organize them all. I hope everyone has a village like mine. Because they are truly the best and I can’t imagine what this past month would have been like without them.

    So what’s happened during this year+ blogging hiatus? A lot. More than I can even begin to write about and some I don’t know if I’ll ever be able to write about. Not without a whole lot of whiskey in me and a box of tissues anyway.

    I have no idea where to start, so I’ll start with the easy stuff I guess. Local Depot is still going strong. At the beginning of 2021, I became full owner of the store. The vendors we have at LD are absolutely amazing. I am so lucky to have them there. From the beginning, my goal with LD has always been to bring something good home to the people of Dunlap and my vendors help me do that everyday.

    This is a shot of the storefront from around Valentines Day. We asked all of the kindergarteners from the local elementary school to color a heart with their name on it for our windows. Isn’t it the most precious thing you ever saw? If you want to see more from Local Depot, you can follow us on Facebook and on Instagram.

    The AirBnB above Local Depot is all finished and has been on AirBnB since around June of last year.

    We call it the Loft at Local Depot. It’s all “studio style” complete with a king bed, two bunk beds, a living area, full kitchen and of course, bathroom.

    We’ve been fortunate to host some great guests! And while it is definitely something you have to work at, I will say that it has been less stressful than I thought it would be. You can see more of the Loft here.

    And then I bought another building last year!

    This is totally a picture of a picture because I don’t have a single picture of the exterior of this building on my phone. So this building is home to the Bouffant Beauty Salon on the left, where the one and only Anna Faye Heard has been doing hair for 60 years. The building was originally two separate buildings. In older pictures you can even see the different rooflines. There is only one door between the two buildings on the inside. The Bouffant will be staying right where it is, but the back part of the other side is now home to Grow in Grace Dance Studio (so proud of my Zoe girl!) and the other part is where we’re putting in another store – Johnson’s 7.

    Grunt always tells me that I have to tell people my “Why” behind all my ideas. There’s a lot of “Whys” behind J7. Like LD, I want J7 to be something good for Dunlap and its people – the hardworking folks like my family who have been in that valley for generations. Johnson’s 7 will be centered around the small town, rural, farm crowd.

    A big “Why” though for J7 is my Uncle Lynn. My Uncle Lynn always had so many ideas for Local Depot and what could be done with the Bouffant building. He would sit at the end of the counter at Local Depot, I would be pricing things or stamping bags and he would be spouting off idea after idea. He died this past December. There’s nothing in life that prepares you to be without the one person who always had the answers you needed, who was your safety net and so much more. I don’t think I could put into words how it really feels, but its like the world fell out from under me and I was on an island, completely lost. Earlier this year, it became clear what I should do with the Bouffant building – take all of Uncle Lynn’s ideas and then some and create a store for folks like us. We’ll have freezer beef from our farm available to purchase, as well as all the sauces and rubs to go with it, leather goods, a retro soda and candy section, t-shirts for the rural crowd, cigars (definitely an Uncle Lynn idea) and much more. The goal was to be open by October, but with the broken leg, it may take a little longer. You can follow Johnson’s 7 on Facebook here. And if you’re wondering how we came up with the name, Johnson’s 7, well, Johnson is my family’s last name, my maiden name. The “Johnson” you see in the logo is actually my Pap’s signature, just bolded and an “‘s” added to it. The “7” is what my family used to brand on our cattle. The notch in the 7 nods to how we tag our cattle now – a notch in their ear.

    Uncle Lynn outside Local Depot last September while we were working on a display.

    To be completely honest, the past eight months have been the hardest of my entire life. There have been many afternoons leaned up against a headstone waiting for all the answers to come to me that he would have had. There’s been a lot of screaming alone. There have been countless times where I’m plastering on a smile and sunglasses over red, teary eyes in the car rider pickup line. But there have also been times when we know he’s right there. Like when the exact cow you needed goes right into the lot by itself. And sometimes he’s still around causing mischief. Like on the day of his funeral when the cattle were running through the cemetery and when the horse took off galloping down the road and I was sure I’d get a call from the Sheriff saying the horse was crossing the main highway.

    But, the show must go on, right? And so, we try to remember all the tricks the Boss taught us and do something that makes him proud.

    We made it through another year of sweet corn. As Aunt Sherry and I have both said, I’m glad to see it in the ground and growing, but even more glad when it’s all picked and sold!

    These Hereford mamas are still eating right out of our hands…

    And Grunt has added a few new ones to the herd as well. Earlier in the spring, we had some friends over to the farm and all the kiddos got up close and personal with the cattle.

    And also, in the past year or so….

    We had a great 4th of July – my favorite day of the entire year.

    Hee Haw returned to Dunlap this year!

    The local Cancer Support Network in our town does an annual show of Hee Haw to raise money. Because of COVID, the show wasn’t able to happen for the last couple of years, but this year, we got to do it again! It’s one of my favorite weeks of the year.

    We took a trip to Savannah last summer and we all had a ball. The Circus discovered virgin Frozen Daiquiris and hasn’t stopped asking for them since.

    We went to see Garth in Nashville last summer, but it got rained out….

    But we did get to see Eric Church and George Strait in Atlanta last fall, which was amazing. It was also the Circus’ first encounter with Port-A-Potties and let me tell you, it was an experience.

    We were visited by both Beetlejuice and Maleficient last Halloween. And y’all – I can’t wait to show you her Halloween costume for this year. Fingers crossed that she sticks with the same character she’s been saying she’ll be for the past few months.

    And last Saturday, I successfully made it to the top of the hill to feed the cattle without breaking a bone. Of course, Grunt was the one feeding the cattle, not me. And we took it nice and slow. Like the good Lord intended.

    I hope all of you out there are doing well! Please drop me a comment below and let me know what you’re up to!

  • The Circus’ Bed Refresh

    The Circus’ Bed Refresh

    The kid has good taste.

    Last year, when I gave our master bedroom a refresh, the Circus fell in love with our new bedding. She absolutely loved how soft and cozy it was. Anytime she could, she curled up in our bed to watch T.V.

    Needless to say, when we started chatting about her room makeover, she asked for bedding like mine.

    And while she didn’t get the same design and color as my bedding, it did come from the same place and she loves it just as much as mine – and probably more since it’s all hers!

    Disclosure: Crane and Canopy provided the bedding for this space. However, all opinions are 100% mine.

    We wanted something that wouldn’t compete with her new confetti wall, but would also make a statement itself – the Berry Damask Patterned Bedding from Crane and Canopy fit the bill perfectly!

    The berry color coordinated well with the purple color in her confetti wall as well as other splashes of purple throughout her room. It also worked with the pink color on her other three bedroom walls too.

    The duvet cover is perfect for kiddos because it comes right off the comforter for easy washes. It has interior corner ties as well though to keep the comforter in place while it’s in use – no more comforter going to the bottom of the duvet cover!

    I think the tiger approves as well, but I’m not sure if he’s cool with the party hat yet. Isn’t that little confetti pillow the sweetest? One of the vendors at my store made it for the Circus when she found out she was doing a confetti wall in her room. It’s the perfect way for bringing the confetti wall and bedding together!

    This print also comes in other beautiful colors – a gorgeous yellow and a beautiful cobalt blue.

    There are more bloggers who I’ve teamed up with to do a bedroom refresh today as well….

    Camila from Effortless Style

    Kate from Kate Decorates

    Ashley from At Home with Ashley

    Chelsea from Two Twenty One

    Carmel from Our Fifth House

    Tiffany from My Eclectic Nest

    Tasha from Kaleidoscope Living

    Yuni from Love Your Abode

    Katrina from Katrina Blair

    Be sure to visit everyone for more bedroom decorating ideas!

  • DIY Colorful Confetti Wall

    You could go with the wallpaper version….or you could go full-on DIY and save yourself some money AND time!

    I may be full of quick and easy projects, but Lord help me, I’m having a hard time getting them posted in a timely manner! The Air BnB project (The Loft at Local Depot) has been taking up lots of my time – it’s so close to being finished y’all! The kid and I have managed to squeeze in some time here and there to just about finish up her room makeover though. It’s about 90% done, like the BnB, but you know that last little bit always takes the most amount of time to complete, right?!

    Anywho, here’s our latest shenanigan.

    DIY Colorful Confetti Wall

    When we first started chatting about her room makeover, she found a confetti wallpaper that she fell in love with. It was adorable, it was also going to take a good chunk of her room makeover budget. The more I looked at it, the more I thought we could replicate the look ourselves without spending as much or having to put up wallpaper.

    And I was right.

    When I posted this wall on social media after we did it, there were so many people who commented and said, “This must have taken you days to do.” Nope, it sure didn’t. All that “confetti” was on the wall in about 30 minutes. The longest part of this project was painting the wall white for the base color and that wasn’t bad at all!

    This post contains affiliate links for your shopping convenience. Click here to read my full disclosure policy.

    How to Paint a Confetti Wall

    Supplies and Materials Needed:

    Steps

    Step 1


    Paint the wall with your base coat of white paint.

    Step 2

    Using one of your confetti colors, dip just the tip of a foam brush into the paint.

    How to paint a confetti wall easily with sample pots of paint.

    Tap the foam brush on the wall. Repeat this in a random pattern on the wall.

    Reload the foam brush with paint as needed.

    Step 3

    Repeat Step 2 with the rest of your confetti colors.

    After you’ve covered the wall with all your confetti colors, step back and fill in any empty spots as needed with confetti.

    Easy and Cheap Colorful Confetti Accent Wall

    That’s it! Told you it was super easy! If you wanted to add a fun pop of glam you could throw in a metallic as one of the confetti colors.

  • Simple Light Fixture Update for Less than $15

    Simple Light Fixture Update for Less than $15

    Trim + Peel N’ Stick Fabric Tape = A light fixture full of pizzaz all in 15 minutes or less.

    There’s this “rule” so to speak in the blogging world that you shouldn’t write a blog post and throw it up there just because you feel like you need to post something. I get that – to a degree. People don’t want their inboxes flooded with crap. Listen, I hit delete on probably 100+ emails a day – I get it.

    However, I think that this “rule” has snowballed somewhat and now lots of us feel like every blog post we write should be some detailed tutorial of an elaborate project that you never would have dreamed of before or an in-depth post on all the different types of painting techniques, types of paint, etc. I get that too – those posts are super valuable and awe inspiring sometimes, right?

    But what about those simple little projects that you may not see as much of anymore because they aren’t deemed “blogworthy”? What about those little gems that can be tackled in just that wee bit of time that we are able to carve out between school pickup and cooking dinner? We need more of those! Those are often the projects that give us that jump we need to tackle those bigger projects on the weekends, right?

    So here’s one of those projects. A simple light fixture upgrade with trim. It’s nothing monumental. It’s nothing that hasn’t been before. But it’s simple, added some pizzaz and took a whopping 10 minutes and costs about $15.

    This post contains affiliate links for your shopping convenience. Click here to read my full disclosure policy.

    The Circus was given a budget for her room makeover. Her paint and any other new items she wanted for her space had to come out of her budget.

    She said she wanted a new light fixture.

    I said that will take up more than half your budget.

    She said never mind.

    She’s a penny pincher, y’all.

    So I proposed the idea of using trim to run along her current light fixture’s shade as a way to upgrade it without killing the budget. She was in.

    We went to Hobby Lobby and I introduced her to the fabric trim aisle. Oh the possibilities, y’all. We were on that aisle for a solid 10 minutes (which is a long time for a kid) trying to decide between a tassel trim, a solid colors pom pom trim, or a tie dyed colors pom pom trim. Just as we were about to get the tie dyed colors pom pom trim cut, she changed her mind once more and ran back for the solid colors pom pom trim.

    Serious, life altering decisions, y’all.

    We came home and ran some Peel and Stick Fabric Fuse along the bottom edge of the light fixture’s shade, then the trim on top of it. All done in about 10 minutes.

    And in the end, she was confident she made the right trim decision. Thank you Jesus.

    There’s a sneak peak of the room coming together – guess we should really switch out those Christmas sheets, huh? Real life, folks.

    A few other ways we’ve utilized some fun fabric trim around the house…

    On the Circus’ shower curtain in her colorful boho bathroom…

    On a window cornice in my office…

    On an adorable step stool makeover…

    And on some storage boxes in my closet…

    I promise to be back soon with some elaborate post that will be absolutely mind blowing – or not. 😉

  • 8 Unique & Cheap Wall Decor Ideas

    8 Unique & Cheap Wall Decor Ideas

    Want to break away from the usual wall decor and stay on budget? These wall decor ideas are super affordable – you’ve probably already got a few laying around your house!

    Monday was a sad day in our house. Well, a sad day for Mama but a happy one for the Circus. We said goodbye to the adorable little text and object wall in her room.

    She’s been talking about a room makeover for the better part of a year now and it’s finally coming to fruition for her. Alas, the vision she has for her new room doesn’t include a wall all about her. Instead, she envisions a confetti wall there.

    While the wall is here no more, it will always be one of my favorite projects and one of the most unique ones I’ve done as well. Planning her room makeover and the design for The Loft at Local Depot has had me thinking out of the box for wall decor. Here’s a few of my favorites I’ve done in the past. The great part about these wall decor ideas is that you probably already have what you need for some of these laying around your house – so they are going to be especially unique to you and cheap too!

    8 Unusual Wall Decor Ideas

    Text & Object Wall

    Since we’re in mourning this week over the loss of this wall, let’s start with it…

    This wall was made up of vinyl lettering and objects. In the place of some words, I replaced the word with the actual object – like a horse or tutu. The whole wall was about the kiddo and her little personality. The complete how-to for the object and text feature wall is here.

    Special Mementos

    In the den at the farm, I used quite a few special little things to decorate the walls.

    I have the center piece from my Pap’s truck steering wheel mounted in a frame and his belt below it.

    On the opposite wall, I hung Grunt’s grandpa’s service hats.

    The kitchen wall at the farmhouse is full of treasures – one of my favorites though is this paddle that my Grannie got when she retired. See more of the farmhouse here – it’s filled with lots of treasures.

    Things they’ve outgrown…

    Our laundry room also doubles as a mudroom / pool room, so we went with a swimmer theme and bright colors in here. I framed my daughter’s first swimsuit for this space and it’s one of my favorite things in here!

    Hang Baskets on the Wall

    Another trick I use in my laundry room / mudroom – vintage metal locker baskets on the wall! These are perfect for corralling sunscreens and pool toys and look good while doing it. There are lots of other laundry room – mudroom ideas here. I also used baskets just like this once to create wall storage for cookbooks in my kitchen.

    Travel Souvenirs

    Y’all know part of my heart is in New Orleans. One time when we visited, I got an extra bag from Cafe du Monde and framed it – super cheap and it always reminds me of good memories made in NOLA.

    Related: Things to Do in New Orleans with Kids

    Loved Ones Handwriting

    When I redid my office, I really wanted a special reminder of my Pap in there. Something I could look up at when I was stressed or ready to give up that would remind me to pull it together and saddle up. I pulled out some cards he had given me and scanned in his signature and where he had written my name, then printed them out for wall art. You can also see more of my budget-friendly office makeover here.

    What kind of unique wall decor have you guys done before? I’m off to continue work on a colorful confetti wall!

  • Coming in 2021…The Loft at Local Depot

    Coming in 2021…The Loft at Local Depot

    Look at me with another new post this week! I’m trying hard to get on a regular schedule. Crazy enough, I think the kid being all virtual right now with school is actually helping me get some posts written. While she’s doing her zooms, I’m working on my computer in the other room. Now, getting physical hands-on projects done, well………..that’s another story.

    I’m so excited to tell y’all about this new project of mine! If you didn’t know, my store, Local Depot, is in a two story building. I bought the building and while the first floor has been working hard this past year housing the store (if you’ve been in, you know that I utilize just about every square inch of that floor space!) , the upstairs has just been there…

    Don’t be fooled – it wasn’t looking like this most recently. It had become a catchall for extra inventory, display pieces, etc. The image above though is what it looked like when I first bought the building.

    We threw around multiple different ideas for this space. It’s one big open space with a bathroom and plumbed for a kitchen. Making it an event space was a big contender, however the only way to access this space is by stairs (which is a big flight of stairs) and ultimately, I felt those stairs would rule this space out for a whole lot of events due to the fact that it’s not handicap accessible.

    Creating an AirBnB up here kept coming to the front of my mind though – so that’s what we’re doing!

    And because I’m apparently a huge alliteration fan, we’re calling it The Loft at Local Depot. Ready to hear all the plans for it?

    The Loft at Local Depot: The Plan

    This post contains affiliate links for your shopping convenience. Click here to read my full disclosure policy.

    Navy Paint / Plaid Bedding / Industrial Side Tables / Navy and Red Striped Rug / Flooring / Lighting / Red Side Tables / Bunk Beds / Top Vintage Car Print / Bottom Vintage Car Print

    The general design is a mashup of Industrial elements, with splashes of red and blue Americana touches and a smidgen of Mid Century. It may sound like I have no idea what I’m doing (and one could argue that I usually don’t have any clue I’m doing….) but in my head, I do see all this coming together to form a unique space that folks will hopefully love to stay at over and over again.

    The loft is one big open space, with the exception of the bathroom. You saw one end of the space above and here’s a shot of the other end of the space…

    That end you see will eventually have a kitchen on the left and then the bathroom is there on the right. So let’s talk design details….

    Flooring

    Probably the biggest change coming to this space with the exception of the kitchen, is the flooring. This place was clad in some not-so-lovely commercial carpet in a lovely shade of, I suppose I could refer to it as dreary day gray. Originally, I had just planned to rip up the carpet, sand the plywood subfloor below and stain it. But like divine intervention, Select Surfaces who I worked with on my mudroom makeover last year, reached out and asked if I had any place where I could use their new line of SpillDefense Laminate flooring. Well, what kind of flooring could be better for an AirBnB than SpillDefense?! On top of that though, we have been so pleased with the Select Surfaces flooring we put down in our mudroom. Grunt Labor sings its praises to anyone who asks him about flooring.

    After ripping up the carpet that was glued to the carpet pad and then the carpet pad that was glued to the floor (which took days and days and days), we were good to lay the flooring. We went with the Cocoa Walnut in the SpillDefense. It has a gorgeous hand-scraped finish and color variations to make it look like the real stuff, but with that durable spill protection! Install went fast. The whole 2000 sq ft. was laid in just a couple of days. The flooring was able to be installed right on top of the plywood subfloor and was a simple tongue and groove click together install. I’ll have another post coming up with more details about the install.

    Walls, Trim and Color Scheme

    There’s a whole lot of wall space up here. With the exception of one small accent wall, which is painted gray, everything else is painted white. And it doesn’t really need a paint job at the moment. So rather than paint 16 ft. tall walls, we’re going to embrace the white and dress it up by focusing on accent colors and patterns. The whole space needs new baseboards so we’re going to bring a punch of color to the space with those by painting them navy. The stairs will get the same navy hue – I’m super excited to see how that plays out!

    As you can tell from the design board, we’re bringing in lots of red, blues and green – a touch of Americana, but not too 4th of July even if it is my favorite day of the entire year. I think it should all work well with that Industrial vibe we’ve got going too.

    Sleeping and Living Spaces

    Like I said earlier, this is one big open studio style space. I do plan on bringing in some unique room dividers to divide up the spaces. There will be a master bedroom area with a queen size bed and two sets of bunk beds – plenty of space for a whole family to stay or for a few friends to enjoy a weekend together.

    Navy Paint / Plaid Bedding / Industrial Side Tables / Navy and Red Striped Rug / Flooring / Lighting / Red Side Tables / Bunk Beds / Top Vintage Car Print / Bottom Vintage Car Print

    I’m still trying to find a good sofa and side chairs to work for this space. I have come across some that could work, but they didn’t scream YES!, so I’m still on the hunt. I have been really lucky in finding some great decor accessories (like vintage automobile prints similar to those above!), coffee and side tables and even a bar with barstools in my thrifting trips!

    Then of course, there’s the kitchen. I have some ideas and some great industrial pieces for creating a really unique kitchen vibe – I just have to sit down and do some measuring and planning – stay tuned for more details on that as well!

    Overall, what do you think of the design?

  • DIY Cruella Deville Costume

    It’s always fun to be a villain on Halloween, right? This DIY Cruella Deville costume was made from a few thrift store finds, some simple makeup and a few perfect (but budget friendly!) accessories.

    It’s one of my favorite times of the year, folks – Halloween! Y’all know, the Circus and I start planning out our Halloween costumes in the summer, ok, sometimes the spring. haha!

    While my witch costume from a couple years back is one of my all time favorites – you can never go wrong with a good witch! – my Cruella costume from last year was really fun to put together as well.

    DIY Cruella Deville Costume made from thrift store items.

    101 Dalmatians wasn’t ever really one of my favorite movies growing up, but Cruella has most definitely grown on me over the years. Well, Glenn Close as Cruella has grown on me – she was just fabulous in that movie!

    I don’t buy readymade costumes unless it just makes more sense to – homemade ones tend to be soooo much better, right? This Cruella costume DIY was easy to put together and affordable – half of it came from the thrift store!

    This post contains affiliate links for your shopping convenience. Click here to read my full disclosure policy.

    Cruella Deville Costume

    If you don’t want to read all the details about how I put it all together, here are “ingredients”:

    • Black and White Wig – I used this one.
    • Long Black Dress – Look in the formal section at your local thrift stores. I scored mine for $4 and one day, it just might double as an Ursula costume.
    • Fur Coat – Again, thrift store! I actually already had my black and white fur coat on hand (I have a thing for furs.), but it was purchased at a thrift store and that’s where I have found most of my furs.
    • Red Gloves – I used these.
    • Cigarette Holder – I used this one.
    • Red Lipstick
    • Green Eyeshadow

    Cruella Makeup and Wig

    I don’t go crazy on makeup with Halloween costumes. I wasn’t going to paint my face white or gray to give it that true Cruella skin color. All that paint just annoys the heck out of. So, as I did with my witch makeup last year, I just put on my regular base of makeup, perhaps a bit more heavy and then embellished with eyeshadow and lipstick.

    Cruella Deville Costume Makeup and Wig

    I loaded up my eyes with green eyeshadow, black eyeliner and gave those brows a good thick coat of eyebrow mascara as well. And of course, red lips are a must for Cruella!

    There are quite a few different black and white wigs out there to choose from. I actually tried three different ones and this one worked best for me. It held it’s shape nicely and had that Cruella flair. Be sure to use a wig cap with it – makes putting the wig on so much easier!

    Cruella Clothing and Accessories

    Cruella Costume with black and white fur coat, long black dress and red gloves.

    For the base of my Cruella outfit, I just found a long formal black dress from the thrift store. It certainly doesn’t have to be a formal dress, but when it’s only $4, you go for it. I paired it with a black and white fur coat I already had as well, but had found at a thrift store a few months back.

    Don’t forget to accessorize! Red gloves and a cigarette holder are no-brainers for Cruella. I also opted to glam her up a bit as well with some oversized costume jewelry.

    Cruella Costume DIY with black and white wig, accessories and makeup.

    I’ve had those clip on earrings for years and this costume turned out to be the perfect chance to wear them.

    And if you have a significant other like mine who prefers extreme comfort in his Halloween costume, you can get him this Dalmatian costume…Find it here.

    Looking for another fun Halloween costume? Here’s one of my all time favorite DIY witch costumes.

    And this DIY witch broom is a must for accessorizing your witch costume AND decorating with!

    Here are some of my best easy and cheap Halloween decorating ideas to get your house Halloween ready!

    Follow us on social media for more Halloween shenanigans!

    Facebook | Instagram | Pinterest | Twitter

  • How to Decoupage a Table with Wallpaper

    How to Decoupage a Table with Wallpaper

    Here’s a great idea for your next furniture makeover – layer on some wallpaper! This tutorial shows you how to decoupage a table with wallpaper – use this method on any piece of furniture to add unexpected interest and pattern!

    Y’all, I can hardly believe it either, but I’m writing a new blog post! Go me!

    Whew, it has been some hectic last few months. Getting the store ready to open, opening the store, getting into the new swing of things, grand opening celebration, 4th of July – it’s been a lot. A good lot though.

    I’ve been wanting to write a new blog post for well over a month now, but time just wasn’t on my side. I’m starting to find my new routine though, so hopefully I’ll get this two job thing figured out.

    Enough about me. How are you guys? Are you all making it through this pandemic ok? Have you adjusted to this weird new normal? We’re trying to stay positive, yet realistic here. Sometimes it’s hard, right?

    Let’s chat about something bright and colorful today, shall we? Something that got a whole new lease on life….

    how to decoupage a table with wallpaper - bird wallpaper applied to base of white table

    This bird table! Doesn’t it just make you smile? I used some leftover wallpaper I had from our bright and colorful mudroom makeover. It was quite drab before…

    how to apply wallpaper on furniture - basic table before painting and applying wallpaper.

    I passed it by several times at a local thrift store months and months ago. Finally, it hit me one day as to what it could be, so I brought it on home!

    How to Apply Wallpaper on Furniture

    Supplies and Tools Needed

    Step 1

    If you’re painting your table or piece of furniture a different color than what it already is, you’ll need to do this first.

    While my table was super heavy and solid, it had a laminate covering over much of the wood. Since laminate surfaces can be tricky to paint, I opted to go with an oil-based paint to get maximum adhesion and durability.

    Lightly sand the surface of the table to scuff it up and give the paint something more to adhere to.

    how to wallpaper furniture - scuffing up the surface with sandpaper

    After sanding the piece of furniture, use a tack cloth to remove any sanding dust or dirt left behind.

    Step 2

    Apply primer to the surface. Let fully dry, then follow up with your paint.

    wallpaper table - painting the furniture white first.

    I did two coats of Behr Oil Based Paint in Bit of Sugar. You’ll need to wait for each coat of paint to dry completely before applying a new coat. Oil based paint takes quite a while to fully dry; I give all my pieces a full 24 hours of dry time when I use oil based paint.

    Step 3

    After the final coat of paint is completely dry, you’re ready to apply your wallpaper.

    Measure and cut one piece of wallpaper to fit the surface you are covering. Leave 4″ – 6″ of extra paper on each each of the wallpaper. Apply a good coat of wallpaper paste to the surface, then put the wallpaper in place. Use a smoothing tool to work any air bubbles out from under the paper. I used a smoothing brush for this since I was working with a rounded surface. If you’re applying the paper to a flat surface, you could also use a flexible smoothing tool.

    Note: If you don’t have wallpaper paste, you could probably use Mod Podge as well.

    decoupage table - applying wallpaper to the base of the furniture.

    If you need more than one strip of wallpaper to cover the surface, then cut another piece and apply the same way, being sure to match up the wallpaper pattern.

    Step 4

    Trim any excess paper from the edges using a sharp craft knife.

    Wallpapered Furniture - white table with colorful bird wallpaper on table base.

    I love how this adds beautiful color and interest to an otherwise basic table. Wouldn’t this be fun in a breakfast nook or a sunroom?

    While you can wallpaper just about any furniture surface, I wouldn’t recommend applying the wallpaper to a table top that gets a whole lot of use. If people sit and eat there or if it’s a coffee table that sees a lot of action, the wallpaper is probably going to get torn at some point. If you have a side table or some other piece of furniture that is more for decor than hard use, then you could definitely give it a whirl on the top.

    Decoupaged table - bird wallpaper applied to table.

    If you don’t have any spare wallpaper on hand, then you could always use book pages, scrapbook paper, wrapping paper, etc.

    This piece is for sale at Local Depot. It did hurt to put a price tag on it, but I really don’t have a place for it right now. 🙁 I hope someone else will love it as much as I do though.

    Do you have any furniture pieces just begging for a touch of wallpaper?

    Looking for more upcycled furniture makeover ideas?

    Easy Furniture Painting Techniques – these still pack a punch though!

    How to Paint a Plaid Pattern – it sounds hard, but it’s sooooo easy!

    How to Make Furniture Glaze in Any Color – again, easy and colorful!

    Want to come back to these wallpaper table instructions later? Just pin the image below!

    Follow along on social for more furniture flips!

    Facebook | Instagram | Pinterest | Twitter

  • Taking it Home: Local Depot

    Taking it Home: Local Depot

    Hey y’all! How are you? Whew. Despite being in a pandemic, it’s been quite the busy last month for me. 

    You know, just the usual stuff. Parenting, gardening, working, bought a hundred year old building, launching a new business.

    WHAT?! 

    Have I lost my mind? It was already gone, folks. This is just an extension of the insanity that was already there.

    I know what you’re thinking. Seriously? In the middle of a pandemic? 

    When the ball started rolling on this, there was no pandemic. Let me tell you, we planned for many roadblocks, a pandemic wasn’t one of them.

    I could start this story in a lot of places. I could start it from when we got the cops called on us by the town doctor because she thought we were trying to break into the crack house. I could start it amid countless conversations over drinks when this idea was planted and started blooming. Heck, I could start this story way back in the day when Jason and I were just high school kids and he was voted Mr. Sequatchie and I was most school spirit. He was an angel. I was a rebel. 

    Let’s just start with the basics today though, shall we? That building you saw above, 15652 Rankin Ave in my hometown of Dunlap, Tennessee, built in 1920 is the future home of Local Depot.

    Jason and I are embarking on this adventure together. We go way back and have all the embarrassing stories on each other to prove it. 

    Local Depot is a collection of vendor spaces that include pickers, makers, artists, photographers, and other locally sourced goods. Eventually, we’ll also start rolling out DIY workshops and Make ‘N Take crafting events. We want it to be a place where folks can find the perfect gift, where creative souls can showcase their talents, and an inviting place where people come together to learn something new. 

    LD has been brewing in our heads for a couple of years now. We’ve constantly added to it, changed it up and polished it. We also sat on the idea for a while. The one thing we knew for certain was that we wanted to bring something good to our hometown that would benefit as many people in the community as possible. 

    At the beginning of 2020, we started thinking maybe it was time to jump. There are lots of great things going on and in the works in our hometown. It started to feel like a “now or never” type thing.

    We started looking at properties – mind you to rent, purchasing a building wasn’t in the plan. We explored all sorts of places, even one we affectionally called the “Crack House” (as mentioned earlier) and yes, there were syringes strewn about on the floor there. Damn, that place had good bones though. Alas, too much work for us to take on.

    We drove all over town. Nothing was panning out though. It was all either the wrong size, wrong layout, or wrong price.

    We finally decided to take a look at 15652 Rankin. It was for sale, not rent, but it was in the heart of downtown right on the main strip and it didn’t hurt to look, right? 

    And I’ll be damned if it wasn’t kind of the perfect building for what we had in mind.

    Lower Level of the Building When We Looked at It

    Now, it didn’t have the interior character we really wanted, but we had ideas for getting some character back into the space. One thing led to another and before you know it, we made an offer on it.

    Upper Level of the Building

    Alas, no deal could be made. The sellers weren’t budging much on price and my offer was maxed. And so we walked away and started the hunt again. I pestered the hound out of folks who I knew had potential properties for rent, but weren’t necessarily advertising them. After one Friday afternoon of more calls and hunting and no leads, I decided it was time to take a break.

    And wouldn’t you know that the very next Sunday, I get a call from my realtor saying the sellers of 15652 Rankin wanted to reconsider my offer. The next day we had a signed agreement. 

    That was mid-February. By mid-March, we were going into a pandemic and I was going into panic attacks wondering what the hell had I gotten myself into. I can’t count how many times my husband pulled me up from the trenches in my mind or the pep talks my aunt gave me. Y’all, she even made me read The Magnolia Story and we all know I’m not a Magnolia fan, but I’ll be damned if that book wasn’t what I needed right then.

    We closed on the building in mid-April. 

    Let me just tell you, we all know it takes a village to raise a child and it takes a village to raise a small business as well. 

    My husband has done anything we’ve asked of him and then some. My aunt, who has officially earned the title Sargent after all this, rallied the troops and tore into that ugly commercial carpet with a vengeance and led us down the path to restoring the building’s original tile floors.

    The Circus has been nothing but amazing through all this. How this all would affect her and Grunt was one of my biggest worries going into this. The thought of possibly adversely affecting their lives because of a decision I made kept me up at night. However, they have both been incredibly excited and supportive.

    That first day of demo, she was right there with us pulling up baseboard and carpet. She has also deemed herself the official security of Local Depot.

    We truly couldn’t have done this without our amazing support system. Our families have been our biggest cheerleaders. Never once did they question us, they just kept telling us to go for it. 

    My dad is extending his title of Rain on a Tin Roof Middle TN Marketing Manager to encompass Local Depot as well. Apologies in advance to those he may pester. 😂

    My uncle’s supervision during demo was of course, invaluable. How else would we have known we missed a spot? 😂

    And even though their daughter-in-law is embarking on yet another crazy business idea, my mother and father-in-law have been nothing but supportive. 

    And Jason’s family has been just as crucial as mine has. They were right there with us scraping up carpet and painting. And Mama Judy has overseen demo and construction while my Uncle tended to other work. 😉

    We’re on track to open June 4th! If you’re nearby, we’d be honored to see you there! You can follow Local Depot on Facebook and Instagram.

    Along with our incredibly talented vendors, we’ll be painting the town colorfully while bringing back some small town charm to our beloved hometown. Kiddos will even get one of these paintbrushes when they stop by! 

    And this doesn’t mean I’m giving up blogging. No, no, no! I’ll still be around here. I hope to get back on a regular schedule once everything is up and running a little more. 🙂 

  • Plant these flowers to get bountiful bouquets from your cutting garden this summer.

    Plant these flowers to get bountiful bouquets from your cutting garden this summer.

    There’s just something about fresh cut flowers, isn’t there? I love having my own cut flower garden to pull flowers from during the summer. Below, you’ll find my list of the best cut flowers to grow in your own cutting garden. You’ll be overflowing with gorgeous bouquets all summer!

    ‘Tis the season for getting those cutting gardens started!

    Our garden is prepped and just waiting on seeds to be planted. We’ve started some seeds already in containers, but it’s supposed to get cold here again this week, so I’ve held off on getting them in the ground. I’m not too worried about it though. I didn’t get anything in the ground until May last year and still had plenty of beautiful flowers. When will you be planting your seeds and flowers where you’re at?

    My cut flower garden is like therapy for me. It’s hard work – especially in the beginning, but getting out there and working in the soil, planting flowers, pulling weeds and watching it all come to life really helps to calm my soul. It’s something I do for me. There were a few years when I said I just didn’t have time to do the garden. Well a couple years back, I decided I was going to make time for it once more and let me just tell you, I didn’t realize how much I missed it and how much it helped me mentally. It’s a really great escape.

    I’m certainly not a master gardener. I learn more every year and am constantly referring to a 900 page gardening book from the 1960s that my great uncle handed down to me. I have found quite a few “surefire” cut flowers though – ones that have grown well for me and are easy to start out with if you’re new to this cutting garden thing.

    Best Cut Flowers - Teddy Bear Sunflowers

    This post contains affiliate links for your shopping convenience. Click here to read my full disclosure policy.

    Best Flowers for Cutting Garden

    I’m going to break this down into two different types of cutting garden flowers: annuals and perennials. You’ll have to plant annuals every year, but perennials will come back each year.

    Like I said, these are flowers I’ve grown myself and had success with. There are many more varieties of cut flowers, but I wouldn’t feel comfortable suggesting them to you if I haven’t had success with them myself. That being said, if you’ve had success with other types of cut flowers, please do leave them in the comments for the rest of us to give a try!

    And if you’re new to growing a cutting garden, then here’s my cut flower garden guide for beginners.

    Best Annual Flowers for Cutting

    Best Flowers for Cutting Garden - Zinnias

    Zinnias

    You can never ever ever go wrong with Zinnias. Not only are zinnias, in my opinion, one of the prettiest annual flowers that are out there, they are one of the easiest to grow and provide blooms all summer long. A few of my personal favorite varieties of Zinnias include:

    • Big Red – gorgeous deep red blooms with a long vase life.

    • Envy – lime green blossoms that are perfect for bright colorful, summer arrangement.

    • Cut and Come Again Mix – these are exactly what their name implies! The more you cut them, the more they come back with more blooms.

    • Purple Prince – these purple flowers are another favorite of mine. It pairs nicely with the envy zinnias as well.

    Growing from seed is easy with Zinnias. They can be started early indoors or planted right into the ground after the danger of the last frost. I’ve had success both ways.

    Sunflowers

    Best Annual Flowers for Cutting - Sunflowers

    Sunflowers are another foolproof cut flower. There are the huge varieties, which are great for photo backdrops, but my favorites for cutting are:

    • Sunflower Busy Bee – traditional look sunflowers, but not the super tall ones. These get about 3′ – 4′ feet tall.

    • Teddy Bear Sunflowers – I planted these for the first time last year and am completely hooked now. These double flowering sunflowers have a cushion like look and are gorgeous. The first picture in this post is of a teddy bear sunflower.

    Amaranthus

    I planted Amaranthus seeds for the first time last year after having gotten a few in a wildflower packet of seeds and loved them. I love the weeping, drapey look these add to arrangements. I’ve planted two different colors of these beauties:

    • Love Lies Bleeding – a gorgeous deep garnet color.

    • Green – this light green hue is the perfect compliment to brightly colored flowers.

    Best Cut Flowers to Grow in Your Cutting Garden - fresh cut flower arrangement.

    Gomphrena

    I planted these sweet little flowers for the first time last year and I adore them. They are great filler flowers for larger or medium sized arrangements, but also look precious solo. These get about 24 – 30 inches tall.

    • QIS Mix – this is the mix of Gomphrena I planted last year and had great success with. I’m planning to give this Strawberry Fields and Fireworks variety a whirl this year too. They look too pretty not to!

    Gerbera Daisies

    Best Cut Flowers for a Cut Flower Garden - Gerbera Daisies

    I won’t lie, these can be difficult to get going. But if you live in the south and can get these to take root, then they can actually become perennials. That’s how I had success with mine. I didn’t get many blooms that first summer, but the following one, it wasn’t too bad! I’ve found it’s best to buy these as plants instead of seeds. These flowers have long stems as well. A couple of my favorites are Gerbera Glow and these with pink petals and yellow centers, which I like to call Pink Lemonade.

    Best Perennial Flowers for Cutting

    Perennial flowers will come back year after year and tend to get bigger and bigger each year. Here are few of my favorites.

    Best Perennial Flowers for Cutting - Hydrangea

    Hydrangeas

    I absolutely adore hydrangeas. They are my favorite flower and Grunt even planted a whole row of them for me at one of our houses. There are loads of different hydrangea varieties to choose from here.

    Gladiolus

    These are bulbs that you can plant in the spring and bloom in the summer. There is a taller variety and a shorter one:

    • Fordhook Ruffled Pastel Mix – these are the taller variety and the ones that have done extremely well for me in my garden.

    • Butterfly – these are a shorter variety of Glads. My mother-in-law planted some of these last year and they are beautiful.

    Rudbeckia (Black Eyed Susans)

    You’ve really got to love these flowers to plant them. Because once you do, they will just multiply over and over every year. Of course, you can always pull up the flowers from anywhere that you don’t want them. They are very drought tolerant as well and easy to grow. Find them here.

    Echinacea (Coneflowers)

    Coneflowers are similar to Black Eyed Susans in that they will multiply year after year. I prefer Coneflowers to Black Eyed Susans. As these grow over the years, you can also divide them and plant in other places as well. I’ve had great success with this Deep Rose variety.

    Don’t forget – share your suggestions for good cutting flowers in the comments!

    Looking for more ways to get “growing” outside? Take a look at these:

    Cedar Planter Box – DIY this planter and add house numbers to it for killer curb appeal!

    DIY Flamingo Sprinkler – who knew watering the garden could look so cool?

    Flower Pot Ideas – Out-of-the-box creative ideas for planting flowers.

    Want to remember this list of flowers for later? Just pin the image below!

    Best Flowers for a Cutting Garden - zinnias, sunflowers, hydrangeas, black eyed susan, amaranthus, and more.

    Follow along on social to watch our garden grow this year:

    Facebook | Instagram | Pinterest | Twitter

  • Ten Colorful • Eclectic • Glam Bloggers to Meet

    Ten Colorful • Eclectic • Glam Bloggers to Meet

    Last Thursday my computer screen kicked the bucket. It decided to taste the rainbow and become a series of colored stripes going all down my screen. For someone who works from home, this was of course, a bad thing. For someone who works from home with already high anxiety issues, now has her husband working from home too and her kid being homeschooled now as well, it was the tipping point.

    It had already been a stressful week and that screen sent me into the inevitable downward spiral that I knew was only a matter of time.

    I think many of us might find ourselves in a similar situation during this weird time, right? None of this is normal. Most of us have never been through something like this before. It’s stressful. We literally have no idea when this thing could be over.

    So I took that broken computer screen as a sign and checked out. I cleaned out a few closets, the kid and I resurrected her old playhouse, I binge watched some TV, and perused Pinterest for pretty spaces.

    $600 and one week later when my computer screen was fixed, work was still there waiting on me. But nothing was as daunting as it had been because I had taken my cue and gave myself a little grace for a while.

    So friends, if you need a break, take the damn break. It’s certainly ok to be completely non-productive for a day, three days, a week if you need it! This is new territory and there are no “rules” for how to cope with it. Do what works for you.

    All that being said, when you feel like you need to take a break and maybe see a few happy spaces, I’ve got a list of ten fabulous bloggers for you to get to know during this somewhat of a “staycation.”

    10 Bloggers to Fall in Love With

    The Aspiring Home

    Joy, the voice behind The Aspiring Home, has always been a big believer in family and home. She makes gorgeous spaces happen with budget in mind. Her blog is based on a simple truth, that a house becomes a home when it has roots and a family thrives if it’s members have wings and freedom to live out their purpose. Joy aims to help her readers make a home that is both a haven and a launching pad which reflects their own passions and interests in a bright, bold and beautiful way.

    A few of Joy’s gorgeous spaces:
    Eclectic Modern Studio Apartment Design: I’m usually not a big fan of lots of modern design, but I love how Joy pulled in color to even out the modern here.

    Backyard Pool Makeover: Personally, I think Joy should have us all over for a pool party after this whole pandemic is behind us. You will too after you see her backyard!

    A Tale of Two Bathrooms: Two gorgeous bathroom makeovers!

    Reality Daydream

    Nick and Bethany Sy are the creative free-spirits behind DIY/Lifestyle blog, Reality Daydream. They recently purchased a historic mansion (yep, for realz and you won’t believe it!) and have been documenting the ups and downs of renovation and making this home their own… all while sharing tips and tutorials along the way! When they found themselves in the trenches of infertility, they started a journey that would prove to be their most important DIY project ever, and have 3 beautiful girls to show for it.

    A few personal favorites of mine from Nick and Bethany:
    Living Wall Vertical Planner: A super creative way to go vertical with plants indoors!

    The New House Story: Do not miss this one, folks! I love watching them transform this home.

    Stained Art: These two are incredibly talented at staining. And by staining, I mean taking wood stain and a piece of unfinished wood and turning it into a true work of art. You won’t believe this one.

    Craftivity Designs

    Lora, of Craftivity Designs, seeks to create a home that is simple, functional, and beautiful. As a busy mom, she knows that creating a beautiful home isn’t just about looks. Rather, a home is created by the stories of its homeowners and the families who raised them. A home should tell those stories, and be practical for everyday life.

    Don’t you just love Lora’s thoughts on home? Here’s some of her best work:
    Modern Cottage Home Tour: Again, I’m not usually a huge modern fan, but I love how Lora has done it in this cottage.

    Vintage Laundry Room: You must see these drop dead gorgeous green cabinets in here.

    German Schmear Brick: I love this technique for making over brick and Lora did a killer job on her fireplace – it’s such a huge transformation.

    Birdz of a Feather

    Birdz of a Feather is the nesting place that brings together hands-on DIY home and garden renos, crafts and gluten free recipes. Sara’s on a mission, along with her husband (her ‘partner in grime’) to encourage you to feather the nest, one room at a time! A few years ago, Sara challenged herself to lead a more sustainable life by reusing items – whether thrifted, repurposed or kicked to the curb – in new and innovative ways. She never turned back. While some people eat tuna for lunch and recycle the tin, she’s dreaming up ways to turn those tins into a swing out storage tower!

    A few of Sara’s best upcycles and hacks:
    Old Sewing Machine Makeover: You will love the colorful spin Sara put on this!

    Guitar Planter: They should have these on every corner in Nashville! So gorgeous and so creative!

    Blue Jean Planter: This girl is a whiz at planters and this one is the cutest one yet!

    Dimples and Tangles

    Many of you may remember Jennifer of Dimples and Tangles from when I’ve joined in on home tours she’s hosted. I’ve always admired her style and her talent for mixing patterns and colors. She has always said that her home is her hobby.  She enjoys sharing whatever current project she’s working on with her readers, whether it’s a DIY project, tablescape, room makeover, recipe, travel report, or her latest favorite fashion find.  She finds value in inspiring others to be creative in their own homes and to try new things.  Her style is grounded in traditional elements but livened up with a strong dose of bold color and mixed patterns and she loves to transform thrifted and second hand pieces to make them her own. 

    Some of my favorite posts from Jennifer:
    Jack and Jill Bathroom Reveal: She just posted this a short while back and I am still drooling over it! The prints and colors she chose are stunning!

    A Colorful Christmas Home Tour: No one does colorful at Christmas as well as Jennifer does!

    Dining Room Makeover: If you want to see unexpected colors and prints mixed beautifully, then don’t miss this room.

    Tag and Tibby

    Julia is the designer and founder of Tag & Tibby: a website dedicated to DIY home projects, organization ideas, paint colors, and home related craft projects. She enjoys inspiring readers to improve their home on a small budget. Her style is a eclectic with a blend of vintage, mid century, modern, and global.

    Some of Julia’s popular projects:
    Before and After Breakfast Nook: Love the pop of green in this space!

    Air Plant Wreath with Seashells: This is such a creative take on wreaths and air plants.

    Screened In Porch on a Budget: The eclectic vibe in this porch is off the charts!

    Jessica Welling Interiors

    Jess is the fearless interior designer & mama behind Jessica Welling Interiors. She loves to create fun, family-friendly spaces on a budget. Her modern, colorful, plant-lovin’ style comes through in everything she does- from letting her kids help draw the faux wallpaper in their bedroom, to stenciling her fireplace tiles. 

    Some of Jess’s most killer projects:
    How to Paint a Mural: This mural that Jess did in her bathroom is so pretty!

    Outdoor Living Room Reveal: ‘Tis the season to start sprucing up those outdoor spaces. I love the coziness this outdoor living room has.

    DIY Floating Desk: A fantastic little creation station for kids!

    Jennifer Rizzo

    Jennifer Rizzo is a Design/DIY/Lifestyle blogger who also loves also throwing in a bit of crafting and gardening. She believes in decorating your home with a mix of handmade, vintage, upcycled finds, and family heirlooms so your home reflects you. She loves mixing old and new and will paint just about anything. She hopes to inspire you to create your home, and craft your life to design a home you’ll love.

    Jennifer has been around the blogging world for a while, so it’s hard to decide what her best projects are – her site is a gold mine really! Here are a few favorites though:
    Free Abstract Art Printable: Jennifer makes beautiful art and she is giving this one away for free. I adore it.

    Shop Your House Living Room Makeover for Free: I love how she can totally makeover a space on zero budget!

    Master Bedroom Makeover: it’s light, bright and oh so airy.

    The Boho Abode

    Corinna is the the author and creator behind The Boho Abode where she loves creating beautiful bohemian interiors designed for living in. She is a free spirited, nature loving, eco friendly products, globally sourced goods admirer and advocate for fair trade kind of gal. She hopes to inspire others to create change in their life through decorating ideas, life tips, and recipes for a life of wellness.

    Corinna’s style truly embodies that colorful boho style. Here are a few of my favorites from her:
    15 Simple Ways to Enjoy Being Home: We need this one right now, eh?

    Gilded Floral Jewelry Holder: and she made it with Dollar Store items!

    Boho Bedroom: love the punches of color she added to this space.

    Casa Watkins Living

    Stephanie is the owner and author behind the home and lifestyle website, Casa Watkins Living.  Stephanie loves to create spaces and crafts that are full of color, have a modern bohemian inspiration infused with global flair, and have a plant or two….. or more!  Her appreciation for worldly cultures drives her design and inspires unique spaces that show global style with respect to the culture.  This creativeholic hopes to inspire you to create spaces and complete diy projects to make your home they way you’ve always wanted.

    Stephanie kills it on the global style front. I am always in awe of her work. Here’s a few faves:
    Modern White Bohemian Kitchen: You will not believe the drastic difference between this before and after! It’s stunning.

    DIY Geometric Wall Design: I love this colorful fun wall design – and she makes it easy!

    10 Global Style DIY Projects: a fantastic roundup of Stephanie’s amazing talent in one post.

    Enjoy “meeting” new people even while social distancing!

  • TV Shows to Start Watching

    TV Shows to Start Watching

    Finding yourself in need of a new TV show or two to watch? I’d say there’s a big part of the human population that’s in that same boat right now.

    This post contains affiliate links for your shopping convenience. Click here to read my full disclosure policy.

    My crew has had Netflix, Amazon Prime and of course cable TV for a while now, but we decided there wasn’t a better time to go ahead and get Hulu too. Between all those, a few good books, working from home, home schooling and taking care of multiple things around the house we’d put off, “bored” isn’t a word that’s being used around here right now. 😆

    I thought I’d share some of our favorite series in case you found yourself in need of a new show to fill some time or even binge watch when need be. We all need a good binge watch session every now and then, right?

    Series to Start Watching

    Shows to Bingewatch Right Now

    We use an Amazon Firestick to stream shows and movies via Netflix, Amazon Prime and Hulu. It’s super simple to use. If you don’t already have one, now’s the perfect time to get one.

    Shows on Netflix

    Best Shows on Netflix to Watch - Grey's Anatomy

    Grey’s Anatomy

    What better time to start Grey’s from the beginning? Relive the George and Christina days. Don’t forget about Burke either. Skip the episode with the shooter in the hospital and the one where Derek dies. There’s no need to put ourselves through that again though.

    Private Practice

    The spinoff of Grey’s. Some people didn’t like it too much, but I was a big fan. I actually watched the entire series over a two week period shortly after I had popped out the kid. That however, was not a smart move as my hormones paired with Private Practice were a bad mix and I just ended up a hot teary mess after every other episode.

    Grace and Frankie

    Jane Fonda and Lily Tomlin. You know something good absolutely must come out of putting those two together! I’ve watched this show from the beginning and it’s hilarious! I’m sad this is the last season though.

    Schitt’s Creek

    Shows on Netflix to Bingewatch - Schitt's Creek

    My friend Sarah recommend this one to me last year. She told the first season wasn’t spectacular but after I got through it, the rest was golden. And she was exactly right. Schitt’s Creek is hilarious. I could just sit and listen to Moira speak with that accent all day long and be entertained.

    The Haunting of Hill House

    If you like to be spooked, then this one is for you. It’s actually really scary. It’s not gory scary. I hate gory scary. I love ghost scary. And Hill House is ghost scary.

    Greenleaf

    New Shows on Netflix to Watch - Greenleaf

    I am very impatiently waiting for Greenleaf to return. I discovered it at the start of this year and have already zoomed through all four seasons. It’s like my daily dose of God and gossip.

    Dolly Parton’s Heartstrings

    Dolly’s Heartstrings series is eight mini-movies based on different songs and stories of Dolly’s. Every one of them is just precious and has a wonderful message behind it.

    AJ and the Queen

    RuPaul is a drag queen and tours the U.S. in his RV. A kid stows away on the RV. It’s hilarious and it’s heartwarming. I’ve always been an anti-RV gal, but this show just made me want to buy an old one, grab the fam and tour the country. Unfortunately, Netflix didn’t renew this one for a second season. Most definitely their mistake there. 😑

    Breaking Bad

    Breaking Bad is one of those shows I thought I would have zero interest in and I was so totally wrong. Yes, it’s about a chemistry teacher and one of his students cooking meth, but it’s so much more than that too. It’s kind of like a smaller scale version of The Sopranos but set in the desert.

    Shows on Amazon Prime Video

    Don’t have Amazon Prime Video? More about it can be found here.

    The Marvelous Mrs. Maisel

    Oh how Mrs. Maisel has saved me. I had seen this one pop up as “suggested for you” countless times before, but never gave it a go. And then at dance class one night, one of the gals was like, you gotta watch that. And so I gave it a whirl and I fell in head over heels. It’s funny, it’s empowering and wickedly good.

    The Good Wife

    Shows on Amazon Prime to Watch - The Good Wife

    I mean really. Can we ever get enough Alicia Florrick in our lives? The hubs and I love The Good Wife and have watched it in its entirety twice now. If you’ve never watched it, you must give it a go!

    Modern Love

    I just started watching this last week. Like Dolly’s Heartstrings, this is a series of mini-films sort of. They’re sad. They’re sweet. And they show just how love is so diverse.

    Shows on Hulu

    Don’t have Hulu? Details on subscriptions starting at $6 a month here.

    Ally McBeal

    via GIPHY

    ALLY MCBEAL IS ON HULU. I REPEAT ALLY MCBEAL IS ON HULU. If you’ve been around here for a hot minute, you know Ally is my spirit animal. Read about all the things Ally taught me here. A few months ago, I decided I needed a little Ally, but when I went to Netflix, she was no longer there. Yes, it was devastating. However, when we got Hulu a couple weeks ago, I found she was hiding there! YAY!!! Ally McBeal is all the things, y’all. Funny, quirky, crazy and real life.

    Brothers and Sisters

    The hubs and I both have our own shows we watch individually and shows we watch together. We needed a new one to start together and Brothers and Sisters was the lucky winner. I had watched the first season of it when it first came out, but then things happened and I never got around to watching the rest of it. We’re three or four shows in and Grunt is already hooked. If you’re not familiar with it, it’s kind of like a family style drama.

    Little Fires Everywhere

    Best Shows on Hulu to Watch - Little Fires Everywhere

    This one just came out and it’s another one Grunt and I are watching together. So far, there are only four episodes out on Hulu, but we can’t wait to see the rest. It’s set in the 90’s, so I’m also loving that little trip down memory lane.

    Shows on HBO

    Six Feet Under

    Best Shows on HBO to Watch - Six Feet Under

    This is one of “Jenna’s weird shows” as Grunt calls it. Yes, it’s set at a family funeral home. Yes, dead people talk. There’s lots of dark humor. But guys, IT. IS. SO. GOOD. And I dare you to find a more beautiful final episode than what Six Feet Under brought to the table.

    The Sopranos (also on Amazon Prime)

    Grunt and I finished our third viewing of the entire Sopranos series last fall. It’s always a good one to start over and watch again. That being said, The Sopranos is not for everyone. It’s about the mafia, so obviously violence often takes center stage.

    Treme

    I’m a few episodes into this one on HBO. It centers around the Treme neighborhood in New Orleans post Hurricane Katrina. So far, I’ve loved how beautifully it’s portrayed the strength of New Orleans and it’s people.

    Big Love

    Again, this was one I didn’t think I would really like, but I loved it. This show about a polygamist just living right down the street takes a big dive into the culture. It was so interesting.

    Shows to Binge Watch on HBO - The Righteous Gemstones

    The Righteous Gemstones

    Hilarious. Freaking hilarious, folks. The man of questionable honor suggested we watch this one. It’s about a family of televangelists in Florida and their megachurch. We are impatiently awaiting the next season.

    Sex and the City (also on Amazon Prime)

    I mean, it’s Sex and the City folks. Nothing else needs to be said. It never gets old.

    Share some of your favorites with me in the comments below!

    Want more ideas for filling your time at home?

    Here are 27 projects you can do when you’re stuck at home.

    And here are some great books to add to your 2020 reading list.

    Want to remember this post for later? Pin the image then!

    Shows to Binge Watch Right Now

    Follow on social for more:

    Facebook | Instagram | Pinterest | Twitter

  • My Best Bright & Cheery Spaces | It’s a Colorful Life Spring Home Tour

    My Best Bright & Cheery Spaces | It’s a Colorful Life Spring Home Tour

    How about a little bright and cheery amid all this madness, huh?

    I’m usually not much of a Facebook scroller, but over this past week or so, I found myself on there a whole lot more. And let me tell ya, it just wasn’t healthy. Upon coming to that realization, I got off Facebook and started perusing Pinterest more than I have before. The beautiful rooms and creative ideas there were a much needed distraction.

    And so today, myself along with lots of other bloggers are bringing you some pretty distractions of our own!

    If you’re popping over from Pender and Peony, welcome! Katherine’s Grandmillenial style is quite colorful and beautiful. And if you don’t know what grandmillenial means, don’t feel bad, I didn’t either. I had to look it up! Essentially though, Katherine’s blog is grandmillenial at its finest.

    Also, a big thanks to our official hosts for this tour – Jennifer from Dimples and Tangles and Jewel from Jeweled Interiors. They each have gorgeous style. Don’t miss their tours!

    In the interest of keeping everything bright and cheery, for my tour today I’m sharing images from some of my most colorful spaces. While I love my moody black living room and dining room, I wanted to keep things brighter today.

    Pink and Green Mudroom

    It’s a little Palm Beach. It’s a little Eclectic. It’s a whole lot of colorful.

    Flooring / Wall Hooks / Pink Door Color

    Mudroom Cabinets / Green Bamboo Fabric / Bamboo Roman Shade / Pink Tassel

    Lighting / Wallpaper / Similar Brass Chinese Symbols

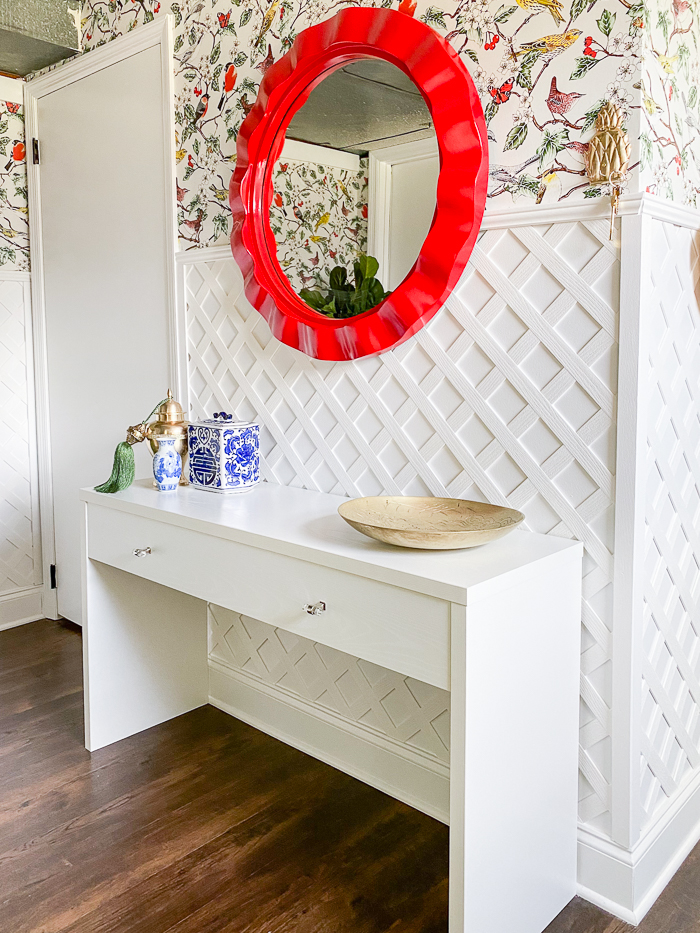
    DIY Indoor Lattice Wall / Red Mirror (similar) / Similar Brass Ginger Jar / Similar Blue Jars / Green Tassel

    See More of the Mudroom Here

    Citrus, Light Blue and Kelly Green Master Bedroom

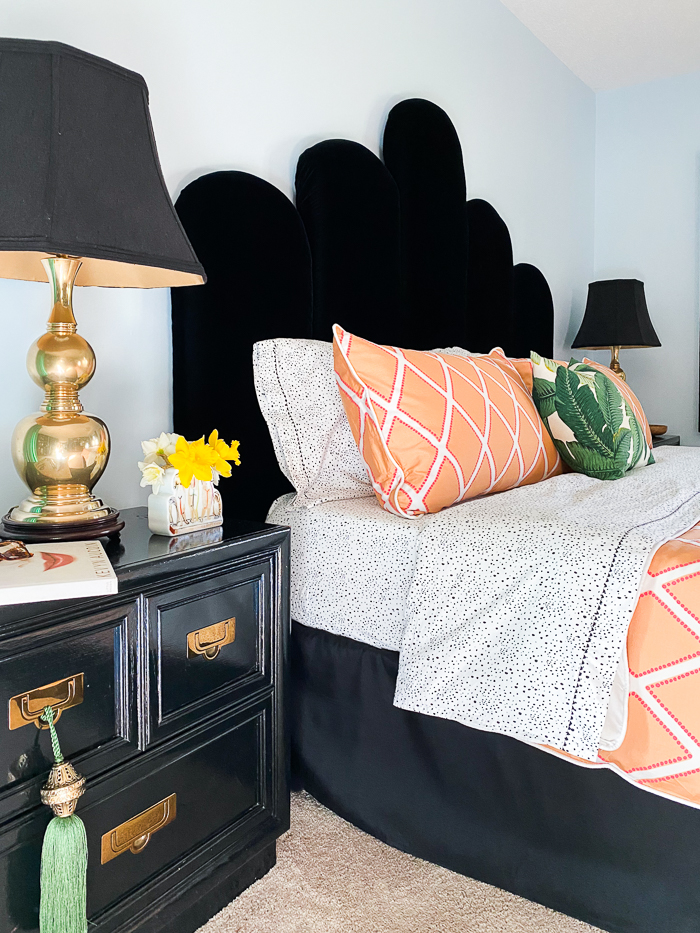
    I just gave my master bedroom a much needed refresh! I fell in love with this citrus bedding and was intent on keeping those kelly green curtains in the space. The conundrum was what wall color to use with the two colors – baby blue to the rescue!

    Citrus Diamond Bedding / Black and White Dot Sheets / Black Bedskirt / Palm Pillow Cover / Green Curtains / Chandelier

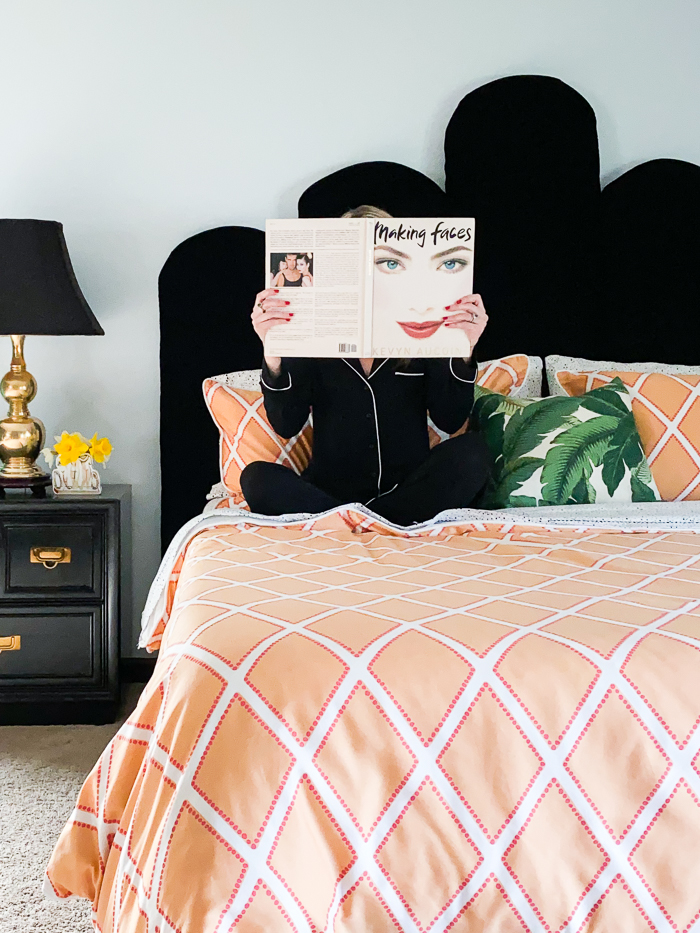
    DIY Hollywood Regency Headboard / Green Tassel / Wall Color – this one + 220 drops of white added

    See more of the bedroom refresh here.

    Colorful Boho Bathroom

    This is my daughter’s bathroom that we recently remodeled last fall. It went from gray and drab to a boho eclectic wonderland perfectly fit for my girl.

    Vanity / Faucet / Mirror / Pendant Lights

    Curvy Wall Moldings / Pug Dog Wallpaper / Tile Flooring / Toilet

    See more of the bathroom here.

    Swimming in Color Laundry Room

    Our laundry room is actually one of the most fun rooms in our house. It works overtime in the summer; it’s the main point of entry and exit to and from the pool. Thus why swimmers simply had to be included here.

    Swimmers Wallpaper / Shadow Box for Swimsuit / Storage Bench

    DIY Kitchen Island (turned mudroom workspace!) / Play the Day Away Art Print

    See more of the laundry room here.

    Peachy Home Office

    Lots of us are spending a whole lot more time in here right now, huh?

    Light Fixture / DIY Built In Cabinets /  Desk Chair / Leopard Print Rug (similar) / Chippendale Desk

    Related: More Comfy and Pretty Office Chairs

    Wall Color / Dolly Print / Leopard Print

    See more of the office here.

    I’ll leave you with the one and only Dolly. You might want to add these songs of her’s to your playlist. They are pretty great at brightening up a dreary day and getting you through any rough patches:

    Light of a Clear Blue Morning
    Better Get to Livin’

    Two Doors Down
    Eagle When She Flies
    Red Shoes

    The next tour in the lineup today is Diana Rose Spier – you will love her colorful take on classic style! I certainly do! See the full tour lineup below.

    Follow on social for more colorful decorating ideas:

    Facebook | Instagram | Pinterest | Twitter

    It’s A Colorful Life Tour- Spring 2020

    Monday:

    Tuesday:

    Wednesday:

  • 27 Projects You Can Do When You’re Stuck at Home

    27 Projects You Can Do When You’re Stuck at Home

    Now is a great time to be super productive at home, right? You’ve got unexpected time there and rather than worry constantly or veg out on Netflix all day, why not use that time wisely and even try to have fun with it?

    No doubt, everyone’s biggest concern right now should be their own health and the health of others. As I said in my post on Tuesday, we can combat that most effectively and do the most good right now when we stay at home.

    Keeping all that in mind, I’ve created a list of crafts, DIY projects, decorating ideas, curb appeal projects and even a couple cleaning tips to fill your time at home right now.

    The materials needed for these projects can all be ordered online and delivered straight to your door! However, I’m willing to bet many of you already have lots of these project supplies on hand already. Like electrical tape, construction paper, scrap fabric and other similar items. I’m right, aren’t I? I knew y’all were craft supply hoarders like me. 😉

    Crafts and Home Projects to Beat the Boredom

    This post contains affiliate links for your shopping convenience. Click here to read my full disclosure policy.

    Get Crafty

    Crafts projects for when you're stuck at home - Easter bunny vases.

    Some of these are perfect for kids!!

    Have the kids help with these Easter Bunny Vases. Guess what? Easter isn’t canceled! Everything to make these cute little simple bunny vases can be ordered online – I’m willing to bet you also have most of the supplies on hand though! Follow that link above for the supply list and tutorial.

    Use electrical tape for nothing it was ever intended for. I’m willing to bet you’ve already got a roll of electrical tape lurking around in your garage, toolbox or maybe a junk drawer. Am I wrong? Here are seven simple, cute crafts that use electrical tape. The kids will have fun with some of these too!

    Duck Tape Crafts. Speaking of tape, every American should have a roll or two of duck tape stashed away, right? Here are 20+ duck tape crafts for adults and kids to do.

    Hide wall sconce cords in style. If you’ve got even just a piece of pretty scrapbook paper, wrapping paper or wall paper hanging around and a touch of Mod Podge, the only thing you’ll have to order to disguise cords in style is this basic cord cover which is the base for this project. Here’s the tutorial for how to hide cords in style.

    Make beautiful silhouettes of your family. What better time than now to make silhouette portraits of your kiddos? If you’ve got black construction paper on hand, you’re ready to go! If you don’t, order some here, then use this tutorial for DIY silhouettes. This one would be fun for the kids too – let them make your silhouettes!

    Recover a lamp shade. Update a boring old lampshade with a fun print or pattern. If you don’t already have fabric on hand, you can order it online from Fabric.com or Online Fabric Store, then use this tutorial for recovering a lamp shade.

    Make faux crystals. And then turn them into magnets, lamp finials and more! The faux crystal tutorial is here and links to everything you need!

    Make mason jar lanterns. Another fun one for the kids to get in on here. I made glitter mason jar lanterns, but you could also use craft paint for yours! And they don’t have to be lanterns, they can be vases, pencil holders or fill them with citronella in the summer for bug repellant!

    Make pretty finials for your lamps. These agate slice lamp finials are incredibly easy to make and in my opinion are the icing on the lamp.

    DIY Home Projects You Can Tackle Now

    DIY projects you can do when you're stuck at home - green painted chair with black and white upholstery.

    Make a cowhide rug. A faux one that is! Just order this faux cowhide or another one of your choice and follow my faux cowhide rug tutorial!

    Make a bottle lamp. If you have a cool old bottle lying around (or say you polish off a bottle of Jack during this time 😉), you can easily turn it into a lamp with a bottle lamp kit you can order online. Follow this tutorial for how to make a lamp out of a bottle to put it all together.

    Makeover a piece of furniture. Have the paint shipped straight to you! My favorite furniture paint, Velvet Finishes will ship their paint and other furniture painting supplies straight to you. Velvet Finishes is also a small business so you’re helping to support them during this tough time. If you’re a newbie to the world of painting furniture, I’ve got lots of tips, tricks and info for ya on my Painting 101 page. If you’re an old pro at painting furniture, maybe one of my previous furniture makeovers here might inspire your next project!

    Paint an accent wall. For this accent wall, all you need is a sample pot of paint. Did you know that you can order sample pots online, but I’m willing to bet lots of you will already have a sample pot or two just hanging around.

    Paint your cabinets or a bathroom vanity. Again, you can have paint delivered straight to your door from Home Depot, Velvet Finishes and other online retailers. Here’s a guide to the best paint for cabinets and here’s a post about when I painted my kitchen cabinets to create a navy and white kitchen.

    Switch out your handrail. Ditch the dated handrail for a glam and modern lucite handrail. You can order everything you need, rail included, and have it delivered straight to you. Bonus – the acrylic rod for the handrail comes from a small business!

    Give your countertops a makeover. Order a can of chalkboard paint and you’re halfway to creating faux stone countertops.

    Refresh and Update Home Decor

    Home decorating projects you can do while you're stuck at home. Blue painted bedroom with black velvet headboard and orange bedding.

    Refresh Your Bedding. Did you catch my recent bedroom refresh? The pink walls are gone, replaced by blue and the bedding is begging for spring weather to arrive!

    Update and/or Add in Color with Runners. Bring a little more interest and pattern to your flooring by throwing down one of these cheap runner rugs. All are less than $30.

    Switch out your pillows. Freshen up your throw pillows with one of these affordable pillow covers. Available in all sorts of colors, patterns and prints. P.S. That list links to lots of pillow covers on Etsy which equates to supporting more small businesses!

    Working from home? Treat yourself to a new comfortable, but still stylish desk chair. You won’t believe how good a desk chair can look.

    Order fabric samples to inspire your next project. Now’s the perfect time to plot out a new room makeover. You can order fabric samples from Fabric.com or Online Fabric Store . Here’s a list of some of my favorite cheap fabrics by the yard.

    Make a design plan. Once you’ve got those fabrics chosen, here’s how to make a moodboard to plot out your entire design.

    Have fun accessorizing. Not with your daily outfit, but with your home decor! Trade out accessories in rooms, pull out treasures you’ve had stashed away. Mix it up and have fun! Here are my tips for accessorizing a space without over accessorizing.

    Work on Your Home’s Curb Appeal

    Outdoor projects you can do while you're at home - cut flower garden.

    Install or replace old dated shutters on your home. Simply measure and order online. These are the ones we put on our house a couple years back. Here’s a guide for how to hang shutters on brick.

    Make a flower garden. You can order seeds from Burpee and use my cut flower garden guide for beginners to get you going.

    Refresh your outdoor furniture. Most outdoor furniture can easily be painted with a few cans of spray paint. Home Depot has their entire line of spray paint available for purchase online. And here are 12 ideas to redo lawn furniture!

    Clean all Those Things You’ve Been Putting Off

    Cleaning projects for when you're stuck at home - restoring copper.

    Polish it up. Copper, Brass and Rusted Chrome are no match for Bar Keepers Friend. Here’s how to use it to clean your copper, clean tarnished cabinet hardware and remove rust from chrome.

    Preserve your upholstery. Grab a can of Thompson’s WaterSeal FabricSeal and go to town (well, actually just your living room or dining room) on your upholstery. Here’s how I use it to protect and waterproof upholstery fabric.

    Read a Good Book

    Don’t forget the power of a great book. As corny as it may sound, you can escape to a different world! Here’s a collection of my favorite books!

    What projects are you tackling at home right now?

    Want to remember this list for later? Pin the image below!

    Home projects to do while you're stuck at home.

    Follow on social media for more:

    Facebook | Instagram | Pinterest | Twitter

  • National Sleep Day Bedroom Refresh Blog Hop

    National Sleep Day Bedroom Refresh Blog Hop

    Did you know today is National Sleep Day? I didn’t know there was such a thing until my friend Camila said, “Hey, wanna do a sleep day blog hop?” Yes, girl! And so here we are. Fourteen of us are sharing our bedrooms all refreshed for spring and ready for national sleep day – in hopes we’ll actually get some extra sleep today. 😉

    I knew the pink couldn’t stay forever.

    Let’s be honest, there aren’t a whole lot of guys out there who would prefer a bedroom with pink painted walls. Heck, there aren’t many guys out there who would let their wives even think about painting their bedroom walls pink.

    I however, have that husband. The husband that just goes with whatever you say. You say you’re painting the bedroom walls pink? He says ok. You’re putting carpet on walls? He says alrighty then. Creating an indoor lattice wall? Go for it.

    I’m pretty damn lucky folks. I really hope you’re that damn lucky too.

    All that being said, I did know the pink walls in my master bedroom wouldn’t stay forever. I knew Grunt wasn’t crazy about it, but it was just something I guess I needed to do to prove to myself I could paint a wall pink and make it work. When the opportunity to join this bedroom blog hop for National Sleep Day presented itself, I knew it was a good time to freshen up the bedroom and paint over the pink.

    Thanks to Crane and Canopy for providing product for this bedroom refresh. All opinions are 100% mine.

    This post contains affiliate links for your shopping convenience. Click here to read my full disclosure policy.

    Blue Bedroom with Orange Bedding, Green and Black and White Accents

    Citrus Diamond Bedding / Black and White Dot Sheets / Black Bedskirt / DIY Black Velvet Headboard / Palm Pillow Cover / Green Curtains / Chandelier

    And so now we have blue walls and citrus bedding!

    Ok, the citrus may not be all that masculine, but it’s balanced out by the blue walls, green curtains and black accents, no? Just say yes, folks. Just. Say. Yes.

    The only things I changed in here were the paint, bedding and lampshades.

    Orange bedding with black and white sheets.

    Citrus Diamond Bedding / Black and White Dot Sheets / Palm Pillow Cover

    I chose the bedding first; it’s The Avery Citrus from Crane and Canopy. To be honest, I’m not usually much of an orange person. But I was looking for bedding that would still work well with my black velvet headboard and when I came across this set, I was like, ‘hmmm…what if…’ and then I showed it to Grunt and much to my surprise, he was like ‘ok, I can do this.’

    It’s a duvet cover, so it can easily be taken right off and tossed in the wash. I love the bright pop of color it brings to the room and the classic diamond pattern will quickly date.

    I got in on a little more pattern play with the black and white dotted sheets. Grunt did doubt me on these at first, but once we tried them against the other two solid options, he was sold on the dots.

    Citrus diamond bedding with black and white accents.

    I switched out the bedskirt as well. I opted for a black one to go better with the headboard and to also contrast and keep the bedding popping over the whole bed. For less than $9, the bedskirt packed some bang for my buck.

    Same nightstands as before – I love these and have no plans of quitting them anytime soon. I just embellished one the drawers with a green tassel that pulls a bit of that green from the drapes over into this space.

    Bedroom with blue walls, orange bedding, black, white and green accents.

    Citrus Diamond Bedding / Black and White Dot Sheets / Black Bedskirt / DIY Black Velvet Headboard / Palm Pillow Cover / Green Curtains

    We’ve had the lamps for a couple of years now. They were Grunt’s grandparents and I absolutely adore these lamps. They polish up beautifully. As luck would have it, I happened upon those great black shades at a thrift store last week and snagged them. I wasn’t sure if they would work better in here than the previous beige ones, but I think they do and Grunt said he likes them better as well.

    I actually had no idea what color I would paint the room until the bedding got here. I was holding paint chips against it, the curtains and the headboard. All I knew was that I didn’t want to go gray or white on the walls. I had a wild thought to try blue and it worked! The exact color is Permafrost with 220 drops of white added to make it a touch lighter.

    The oversized palm art print still worked perfectly for this space. We made that huge diy frame for it for about $20.

    Bedroom with crystal chandelier, blue walls, black velvet headboard, orange bedding and green curtains.

    I think I actually fell in love with this light fixture all over again after painting the walls. Maybe it’s the fixture paired with the blue, but I think I love it even more than before.

    Blue bedroom with green curtains, black and white accents.

    On the wall opposite the bed, I was a bit worried as to how well the blue would butt up against the black and white diamond accent wall. However, I think it turned out great and I now have a new love for a baby blue, black and white combination. In fact, it might be a new favorite triple threat.

    Of course, it’s always best to celebrate National Sleep Day with a new pair of cozy pajamas, no?

    Orange bedding with DIY black velvet headboard.

    This Layla Pajama Sleep Set from Crane and Canopy might be the comfiest pair of pajamas I’ve ever owned. And Grunt will tell you, I own a lot of pjs. These are the absolute softest pajamas ever. You can even get them monogrammed if you want. I had a great aunt I never knew, Treva, who I’m told lived in fancy pjs by day and furs by night. They say I’m a lot like her. I think Aunt Treva would approve of these pjs. 😉

    There are more bedroom refreshes to see!

    Patricia’s Palace • Mimosa Lane • Effortless Style • The Pink Clutch • Dimples and Tangles • Designer Trapped • Oh So Lovingly • Jeweled Interiors • Our Fifth House • Kate Smith Interiors • PMQ for Two • Diana Rose Spier • Crafting Culture

    Follow me on social media for more decorating ideas!

    Facebook | Instagram | Pinterest | Twitter

  • Five Minute DIY Stuffed Animal Storage

    Five Minute DIY Stuffed Animal Storage

    Does your kid have their very own, very complete stuffed animal zoo? Same here! They were taking over our lives until we got creative with our own DIY stuffed animal storage. Take advantage of your vertical space and learn how to store stuffed animals better below!

    As many of you may know, the kid and I are frequent thrift store shoppers. Thursday afternoons are what we like to refer to as ‘Thrift Store Thursday.’ I pick her up from school, we grab a snack from Sonic and onto the thrift stores we go to snag the treasures.

    One day at one of our usual thrift store haunts, the Circus and I noticed how they were displaying their stuffed animals vertically on chains. Now that I wrote that out, it sounds kind of like a 50 shades stuffed animal version, but I assure you that is not where this is headed. 😂

    Anywho, we analyzed their stuffed animal hanging storage that day and decided we could modify it and make it work perfectly in the Circus’ playroom.

    diy stuffed animal storage

    We came home, determined what we needed and pretty soon storing stuffed animals around here became so much easier. Did I mention that my kid is stuffed animal obsessed?

    Related: Need a different kind of toy storage in your kids room? Try these wall to wall shelves that we also use in my daughter’s play area!

    This post contains affiliate links for your shopping convenience. Click here to read my full disclosure policy.

    Hanging Stuffed Animal Storage

    This is an easy to install DIY project you can tackle in mere minutes!

    Supplies and Tools Needed:

    Steps

    Step 1


    Mark the location where you want your ceiling hooks to go. Keep in mind you want to come off the wall with them a bit as the stuffed animals will take up some space against the wall. We brought ours out about nine inches.

    Install the ceiling hooks according to the package directions.

    hanging stuffed animal storage - installing ceiling hooks

    Step 2

    Hang the plastic chain on the hooks.

    how to store stuffed animals - hanging chain from the ceiling

    Adjust the chain to the length of your liking.

    Step 3

    Clip the hooks onto the stuffed animals and hang on the chain.

    stuffed animal storage - hanging animals on plastic chains with clip hooks

    We did three vertical rows for the plush toy storage.

    stuffed animal storage ideas- hanging chain from the ceiling and hanging animals from clip hooks

    Organize stuffed animals to your liking. As you can see though, we have no organization method.

    storing stuffed animals vertically by hanging chains from the ceiling

    Let tell you though, having every last teddy bear, dog, rabbit, and all other species very visible has significantly reduced the risk of me breaking a leg in an attempt to find a certain animal.

    Related: Kids Play Table with Storage – perfect for playing farm, legos and more!

    Do you have any creative storage ideas for toys? Share them in the comments!

    Looking for another great idea for the kids? Here’s a few of our homeruns…

    Play Based Learning Play Stations – they won’t know they are learning while they’re playing too!

    How to Build a Kids Stage – and it has hidden storage for dress up clothes!

    DIY Wall Mounted Desk – this one has hidden storage as well and your kids will love having their very own creation station!

    Want to come back to this simple stuffed animal storage solution later? Just pin the image below!

    diy hanging stuffed animal storage from the ceiling - stuffed animals hung from the ceiling on chain.

    Keep up with more of myself and the Circus’ shenanigans on social media:

    Facebook | Instagram | Pinterest | Twitter

  • 18 Cheap Runner Rugs for Your Home That Don’t Cut Corners on Style

    18 Cheap Runner Rugs for Your Home That Don’t Cut Corners on Style

    You won’t have to compromise on style to stay on budget with these runners. Here are 18 (gorgeous!) cheap runner rugs to choose from that are all less than $30!

    I think rugs are a great way to not only bring style and pattern to a space, but to also cozy up a room. Whether you’re layering a rug on top of hardwood floors or a solid carpeted room, it instantly makes it feel a little more like home to me.

    The problem, as many of you may well know is that rugs can be expensive. Sure, we all expect larger area rugs to be more expensive, but when I went looking for a runner rug or two to go in my kitchen and hallway, I was baffled by how expensive some of them were. The thing with runner rugs is that they are often placed in high traffic areas – like my kitchen and hallway I just mentioned. And so, they often get dirty faster than larger area rugs. Who wants to spend $100 or more on a rug that is going to see that much foot traffic? Not me!

    Therefore, I made it my personal mission to find affordable runner rugs.

    I’ve gathered eighteen runners in all styles and colors and they are all under $30.

    Full disclaimer now, each of these was $30 or less at the time of me writing this post. Don’t go blaming me if they’ve increased by $5 or $10. While I wish I could control the pricing of such items, I am but a girl with absolutely zero connections to that industry. 😂 I will try to update this post as needed to reflect new affordable rugs.

    This post contains affiliate links for your shopping convenience. Click here to read my full disclosure policy.

    Cheap Hallway Runners

    Many of these come in multiple different colors, so if you like the style, but not the color, click over and see what else they have. If you’re in the market for an area rug for your living room or even kitchen / dining area, many also come in larger sizes as well and are still affordable.

    Neutral Runners

    cheap runner rugs - greek key design

    Geometric Runner Rug

    This is one of my faves! It has a classic greek key feel. It also comes in a black background / cream design and I adore it.

    cheap hallway runners - gray and silver detailed pattern rug

    Detailed Runner Rug

    This one still has neutral colors, but a more detailed pattern – could hide stains better if that became an issue!

    Grey Toned Runner Rugs

    inexpensive rug runners - vintage grey rug

    Vintage Style Oriental Rug

    If you like your rugs to have a vintage look to them, here’s a great option for $26 – also available in other colors and sizes.

    cheap rug runners for hallways - light grey rug

    Persian Gray Rug

    At $22, this is practically a steal! I’m usually not a gray decor person, but this one has enough detail in the pattern that I really like it.

    Fun Print Runners

    affordable hallway runners - leopard print runner rug

    Leopard Print Rug

    At less than $20, I snatched one of these up for my diy closet makeover as fast as I could!!

    hallway runners - lemon pattern rug

    Lemon Print Rug

    Obviously, this one is more catered to a kitchen. I love how the lemons pop against that black though.

    Related: How to Keep Rugs from Sliding

    Classic Stripes

    cheap runner rugs - blue and white stripe rug

    Navy and Ivory Runner

    I bought this runner for our guest bedroom. It’s simple, but classic pattern works well in there and it’s thin enough that I can throw it in the washer.

    cheap hallway runners - yellow and white stripe rug

    Yellow and Ivory Runner

    Same classic pattern, but with a punch of color. I think this would be fun in a kids room! Both of these come in multiple other colors and sizes.

    Bold Colorful Runner Rugs

    inexpensive rug runners - vintage style green rug

    Saturated Green Rug

    I love this green rug – such a beautiful color. Not sure I’d like it in a big area rug, but I love it for a runner. More saturated colors available too.

    cheap rug runners for hallways - purple trellis rug

    Purple Trellis Rug

    If you’re a purple fan, this less than $25 beauty is sure to make a statement in a room!

    Related: Cheap Upholstered Chairs – 20 for under $300.

    hallway runners - moroccan medallion rug

    Moroccan Medallion Rug

    Lots of great color, but also a good bit of “blank space” to keep it calm and bring the focus to those medallions.

    runner rug - colorful boho rug

    Colorful Boho Rug

    No color is off limits with this one! Lots of pretty colors and details to work with.

    Touch of Color Runners

    affordable runner rug - grey and pink rug

    Grey with a Touch of Pink

    A good mostly neutral rug, but when you look closely, there are little touches of pink there.

    affordable hallway runners - beige and turquoise rug

    Turquoise and Cream Rug

    If you want just a bit of color, this one has a light touch of turquoise in it.

    Distressed Vintage Style Rugs

    affordable rug runners - distressed blue and beige rug

    Blue and Ivory Vintage Style Rug

    Classic blue and ivory colors, but with a washed out vintage feel.

    affordable hallway runner rugs - red distressed rug

    Saturated Red Vintage Style Rug

    I am a sucker for a bold red and this rug is no exception! Talk about bringing drama to a space!

    Traditional Colors and Patterns

    affordable traditional runner rug - blue and beige rug

    Persian Navy and Gray Runner

    Classic navy can go with just about anything and it will never fail you! This one is just $25 too!

    cheap traditional runner rugs - red oriental rug

    Red Oriental Runner Rug

    If you prefer the oriental style, but with a punch of color, this one is less than $20.

    If you find ay inexpensive rug runners around, let us know about it in the comments!

    Looking for more inexpensive home decor items and furniture? I’m always on the hunt! Here are a few more affordable beauties I’ve found…

    Stylish Office Chairs – 10 office chairs that are comfy, affordable, and still stylish.

    20 Knock Off Decor Projects – high-style, low-budget diy projects that still bring the WOW factor.

    Discount Home Decor Fabric – gorgeous upholstery fabric by the yard that’s affordable.

    Want to remember this list for later? Just pin the image below!

    cheap runner rugs - various styles and colors

    Follow on social for more affordable home decor items and ideas!

    Facebook | Instagram | Pinterest | Twitter

  • Restore Wood Furniture with Just Two Things from Your Kitchen

    Restore Wood Furniture with Just Two Things from Your Kitchen

    If you’ve got old furniture that is looking worn, dull and dated, then give it new life with these simple steps for how to restore wood furniture. You’ll just need a couple of things that I bet you already have on hand – no chemical stripper or sanding required!

    If you’re signed up for my email newsletters, you know I’ve been helping my aunt redo her bedroom. We completely remodeled her and my uncle’s master bathroom last fall. By “we”, I mean that I helped with the design and then handed it over to the contractor. My uncle’s version is probably somewhere along the lines of “Jenna spent all my money.” Either way you look at it, my aunt and uncle got a killer new bathroom that is so much more functional for them. I really need to snap some pics and show you what we did. I digress though.

    The bathroom remodel snowballed into a kitchen remodel for them that should happen within the next month or so – can’t wait to show you that one when it’s done too! Somewhere along the way, my aunt got hit with the decorating bug and much to my uncle’s dismay I’m sure, we are now also redoing their master bedroom, mudroom/garage entry and she’s told me when we’re done with that, we’re moving to the living room. She’s a woman on a mission, folks.

    The furniture they have in their bedroom was actually my grandparent’s bedroom furniture. And since our family’s side is a sentimental bunch, we don’t easily part well with things of that nature. Sorry, Aunt Sherry. So a non-negotiable for my uncle was that the bedroom furniture stay.

    The bedroom furniture though, well it had most definitely seen better days. The finish was worn and dull and the pulls were dirty. Initially my aunt wanted to completely refinish it, but she decided she would try to clean it up first. I gave her my secrets for restoring old furniture (without sanding!) and cleaning up the hardware. She put some elbow grease to it, and boom, that 50+ year old bedroom furniture was born again.

    How to Restore Wood Furniture - before and after

    Can y’all even believe that?! And no, she didn’t paint the hardware or use a single chemical / topcoat / whatever on the wood! She took the ‘before’ photo and I took the ‘after.’ Don’t worry, I’m going to have a talk with her about photo angles. 😜

    I’ve used this furniture refinishing trick a few times now and I’ve had the same results – it’s really like magic.

    This post contains affiliate links for your shopping convenience. Click here to read my full disclosure policy.

    How to Restore Furniture

    Restoring Old Furniture - stained antique dresser before.

    Supplies Needed:

    Step 1

    Remove all items from the piece of furniture including the hardware. Wipe the piece clean with a damp cloth or a tack cloth to remove any dirt or dust. If you use a damp cloth, let the furniture dry completely before proceeding.

    Step 2

    Mix 1 part white vinegar with 1 part vegetable oil. I generally do a cup of each.

    Step 3

    Using a clean, soft cloth, rub the mixture onto the wooden furniture.

    To be on the safe side, I suggest testing the solution in an inconspicuous spot on the furniture first, then proceed if all goes well. I’ve never had an issue with this mixture, but if you’ve got a priceless piece of sentimental antique furniture, it’s best to err on the side of caution.

    As you apply the mixture to the furniture, most scratches will disappear and shine will be restored!

    How to Restore Furniture - restored antique mahogany dresser after.

    As I said before, I’ve used this solution for refinishing wood furniture before and I’ve gotten great results. I’ve done it on both dark wood like this, but also on light wood as well and it worked perfectly on both.

    Related: Need to remove paint from furniture and then restain it? Then read this post on restaining furniture.

    Did you also notice how well her brass pulls cleaned up?

    How to Clean Old Brass Hardware

    Supplies Needed:

    • Brass Polish (Brasso is what I use) and/or Bar Keepers Friend
    • Two Cloths – one for cleaning and one for polishing
    • Gloves

    Step 1

    Depending on how dirty your hardware is, you may be able to get by with brass polish alone. If the hardware is really bad though, using Bar Keepers Friend will often drastically cut down on cleaning time.

    To clean the hardware, simply wipe on the Brasso or create a paste with the Bar Keepers Friend and scrub until the grime is gone. I wrote a whole post solely on how to clean brass hardware using Bar Keepers Friend right here.

    Use gloves because this stuff is rough on your hands!

    Step 2

    Once you’ve removed all the tarnish and grime from the hardware, rinse it well, then polish with a clean soft cloth.

    How to Restore Wood Furniture Without Sanding - restored mahogany dresser and brass pulls.

    I’m so glad she was able to bring this bedroom set back to it’s former glory!

    Can you share any tips on how to restore wood furniture without sanding?

    Looking to save yourself more time on furniture makeovers or cleaning things up? Here’s a few of my tricks…

    Velvet Finishes Paint – the no priming, no topcoat way to paint furniture! And yes, I’m serious.

    Waxing Furniture Tips – the easy way to wax furniture if you prefer to go that route!

    Vinyl Seat Cleaner – the best way I’ve found to clean vinyl upholstery.

    How to Clean Copper – restore copper to its original beauty in a fraction of the time!

    How to Remove Rust from Chrome – yes, you can salvage that chrome furniture! Try this trick before tossing it!

    Want to remember this furniture tip for later? Pin the image below to quickly come back here!

    How to Restore Wood Furniture without Stripping or Sanding

    Get more tips on social media:

    Facebook | Instagram | Pinterest | Twitter

  • Easy Furniture Painting Techniques That Still Bring the WOW Factor

    Easy Furniture Painting Techniques That Still Bring the WOW Factor

    Bring the WOW factor to your painted furniture pieces without spending hours and hours in the garage! These furniture painting techniques are simple, but still result in a gorgeous “after.”

    I have three or four pieces of furniture in my garage waiting on me to do something amazing to them. One day in the near future, I’m going to make all their dreams come true.

    I have to, otherwise my husband is going to ban me from anymore thrift store furniture purchases. 😆

    I went through my furniture makeover gallery the other day looking for inspiration as to what direction to go with those pieces. I’m thinking I might revive one or two with one of my “oldie but a goodie” furniture painting techniques, but in a new light. We shall see what I have up my sleeve…

    Furniture Painting Ideas Techniques

    Painting Patterns and Designs on Furniture

    One of my favorite ways to make painted furniture pop is with an unexpected design or pattern on it.

    Painting plaid on the side table was actually really simple! All you’ll need are four different coordinating paint colors and painter’s tape – and you don’t have to measure a thing! It obviously takes a few different coats of paint, but it’s worth it!

    Painter’s tape came to my aid again with the gold “confetti” touches on the coral side table.

    For the tuxedo bar, I freehanded the design from a photo of a friend wearing his tuxedo style t-shirt – it was much easier than it may sound!

    Helpful Tip: When using painter’s tape on a piece of furniture, walls or anywhere else, be sure to remove the tape right after your last coat of paint before the paint dries. If you let the paint dry completely before removing the tape, you risk the tape pulling the paint off!

    Related: Wall Paint Design Ideas with Tape

    Layering Paint and Glazes

    It took me a while to come to the “glaze side.” I was a hold out for a really long time. Now, I’m not sure why! I will say though, I prefer the dark glazes on unexpected colors and I don’t like it when it’s used to create a weathered farmhouse look. Anyone else?

    To create the washed out feel on the blue table, I actually used a clear glaze and mixed a touch of blue paint with it to get the look.

    The fuchsia dresser topped with the dark glaze is one of my favorite unexpected paint and glaze pairings. After painting the dresser in the bright pink, it was a whole lot on the eye, so I toned it down with the glaze.

    My IKEA Tarva hack was how dark glazes won me over. After turning the dresser into a bar and painting it green, I felt it needed a little something more. Dark glaze to the rescue.

    The caribbean blue table came to fruition by me just playing around and adding layers of paint on top of one another. I used two or three paint colors to get the added depth.

    Related: Here’s a great tutorial for How to Make Your Own Furniture Glaze in Any Color

    Contrasting Painted Furniture

    furniture painting ideas - half stained and half painted

    Mid Century Dressing Table Makeover

    I don’t like to paint stained furniture unless the finish is badly damaged. This mid century modern dressing table was mostly in great condition, except for the top. The drawers were gorgeous and I didn’t want to mess with them. So, I opted to only paint the top of the dressing table and leave the rest of the piece untouched.

    Related: If you’re looking for a different approach to staining furniture, read this about how to make your own colored stains.

    See more furniture makeovers with stain and paint combos here.

    Embellishing Painted Furniture

    That red beauty you see wasn’t always quite so embellished. The glass doors were plain, clear glass and the bottom doors were basically wood slabs. Adding fretwork panels to the piece made a world of difference.

    Decorating furniture with wrapping paper. It’s a thing, don’t ya know? This side table was only $3 at a yard sale, but had a badly damaged top. Wrapping paper to the rescue.

    Painting Upholstery

    painted pink and navy upholstered chair technique

    Polka Dot Chair

    I don’t recommend painting upholstery for everyday pieces you will constantly be sitting in. But for accent pieces or chairs you don’t often use, go for it! I completely painted this entire chair – upholstery and all!

    Want to dive into more furniture painting ideas, tips and tricks? See these then…

    How to Wax Furniture the Easy Way – if you prefer waxing furniture, save your wrists and read this tip!

    Restaining Furniture without the Mess – complete how-to on stripping and restaining furniture without the mess that liquid strippers cause.

    Want to come back here later? Just pin the image below!

    Simple Furniture Painting Ideas

    Keep up with more painting inspiration on social media:

    Facebook | Instagram | Pinterest | Twitter

  • Mudroom Cabinets Makeover: From Yuck to Showstoppers

    Mudroom Cabinets Makeover: From Yuck to Showstoppers

    Ready to add some serious wow factor to your mudroom cabinets? This cabinet makeover will leave their jaws hanging!

    You know those chances you take sometimes where halfway through you realize there’s no going back?

    It’s not that you didn’t realize there would be no going back when you started but it just didn’t occur to you what you might do if it failed.

    Man, this is turning into some deep thoughts about plain old cabinets. 😆

    Anyway, that’s how I felt about my mudroom cabinets. I had hated the look of them since we moved into the 70’s Landing Pad four years ago. However, getting the mudroom space into shape was at the very bottom of the list; it’s pretty closed off from the rest of the house and for the most part, we’re the only ones who walk through it.

    While halfway through this project, the “oh shit, I’m in it now” feeling hit me, I’m happy to report that this project was a success…

    Green and White Mudroom cabinets with fabric inserts.

    Here’s what the mudroom storage looked like before…

    Mudroom Storage Cabinets Makeover - the blue cabinets before.

    Someone actually commented on this space saying it resembled what they think some prisons may look like. I was not offended at all. 😆

    I most definitely did not want to lose this great storage space in here. Here’s how I pulled the epic cabinet makeover off.

    Mudroom Storage Cabinets Makeover

    This post contains affiliate links for your shopping convenience. Click here to read my full disclosure policy.

    Supplies and Tools:

    Step 1

    As you can tell from the before picture, my mudroom cabinet doors had holes drilled in them. While these may have been purely for decoration, I think they had more to do with ventilation since this space is in a partially below ground basement in the south. And while previous owners may have liked the “decorative holes,” this current owner did not.

    The first thing I did was have the centers of the cabinet doors cut out to get rid of those holes.

    Mudroom Cabinets with Doors Cut Out

    While this was something I could have DIYed myself, I opted to hand it over to my cabinet guy. I knew he would do a better job of getting nice straight cuts and the same edge measurements for each door. I also knew he’d be able to knock it out in half the time of what it’d take me. I was right on all accounts and it was probably some of the best spent money on this space.

    Step 2

    Paint the cabinet doors and frames.

    After the centers of the doors were removed, I painted all the doors and cabinet frames with Bit of Sugar by Behr. I did two coats total.

    Step 3

    Once everything was good and dry, I put the doors back on the cabinet bases.

    Mudroom Cabinet Ideas - cut outs made in doors.

    I know it might seem weird to put them back up with them not being fully completed, but I felt it might make attaching the fabric easier if the doors were in place.

    I installed the doors using new hinges as the old ones were gross and had been painted over multiple times. I also went on and put the new knobs on at this time too.

    Step 4

    Finally, I attached the upholstery fabric to the backs of the cabinet doors.

    Roll out the upholstery fabric. Measure the openings in the doors and add about an inch or two to each side, then cut that measurement out from the fabric.

    Using a stapler, attach the fabric to the backside of the door with the pattern showing through the opening.

    Cabinet Makeover - attaching upholstery fabric to the backs of cabinet doors.

    I used my power stapler for attaching the fabric. It shoots all the way into the wood the first time, so no hammering staples down. It also goes much faster than using a regular stapler and it’s easier on your hands!

    The biggest thing to remember when attaching the fabric is to pay attention to the pattern on the front. Make sure you’re keeping the pattern straight. Of course if you have a more abstract patten or a solid color, you won’t have to worry about this.

    Mudroom storage cabinets with green and white lattice fabric and acrylic knobs.

    The acrylic knobs went perfectly with the green and white bamboo fabric – they complimented it nicely without distracting from the print.

    Don’t forget to accessorize a little too! I’ve never met a tassel I didn’t like! These from SmithHonig are some of my favorites.

    Colorful mudroom cabinets with decorative fabric panels.

    Window Shade / Pink Color on Door

    I had enough fabric left over to create a window seat on top of a couple of the cabinets. The Circus loves to climb up here and chill.

    The cool thing about this cabinet makeover idea is that if you ever want to change up the look of your space, you could switch out the fabric for a new print and create a whole new feel – and you’d never have to paint a thing!

    Share any creative mudroom cabinet ideas you have in the comments!

    Looking for more DIY cabinet ideas?

    DIY Built In Office Cabinets – all you need are basic stock cabinets from your local home improvement store!

    Best Paint for Cabinets – the lowdown on different types of paint for cabinetry.

    How to Make Cabinets Taller – if you ever need to raise your cabinets for home improvement projects…

    Want to remember this mudroom cabinet idea for later? Just pin the image below!

    Mudroom cabinets with doors that have fabric accent panels on the front.

    Hang out with me on social for more:

    Facebook | Instagram | Pinterest | Twitter

  • Put These Books On Your 2020 Reading List

    Put These Books On Your 2020 Reading List

    Never be without a good book in hand when you add these books to read in 2020 to your reading list!

    I realize we are now a month and a half into 2020, but better late than never right?

    Ok fine, I owed you a book list about a year ago. I know. Life though, y’all.

    Since it has been that long since I’ve shared some of my latest good reads, it does mean I have a pretty good long list of books for ya. If this list doesn’t at least take you into May, then you really need to find another hobby – and that’s coming from an avid reader herself. 😉

    Best Books to Read in 2020

    This post contains affiliate links for your shopping convenience. Click here to read my full disclosure policy.

    Best Books to Read in 2020

    The Unqualified Hostess by Whoopi Goldberg

    Yes, I am starting with this book and no, it’s not your typical “reading” book. It is more of a coffee table book, but ya’ll it’s so much more than a coffee table book. My best friend gave me this for Christmas and I immediately fell in love with Whoopi’s entertaining mantra. If you follow me on Instagram and saw me blubbering over it around Christmastime, you know what I mean. In theory it’s an entertaining book, but this is an entertaining book for those of us who don’t set the perfect tables, are a bit quirky and our main goal is to create magic for our loved ones – especially around holidays. I don’t always read every coffee table book I get, but I read every. single. word. of this one within the first few days of having it. I laughed, I cried and I was so damn inspired. So get this for yourself and then give one as a gift too. Trust me, it’s one of the best books to receive. Find it here.

    The Seven Husbands of Evelyn Hugo by Taylor Jenkins Reid

    Utterly captivating. That’s the only way I know how to describe this one. Oh my stars, ya’ll. This book sucked me in and made me want to abandon ship and just read it all day. It’s centered around an old Hollywood starlet who is “coming clean” about all her husbands after being reclusive for years. It’s not a “Hollywood” story though. It shows the incredible strength of one woman, how she will go to any lengths to protect her family and how she finally is able to live her truth. Find it here.

    Where the Crawdads Sing by Delia Owens

    If you’re a reader and you haven’t heard of this book, then go buy it right this minute. If you have heard of this book and have yet to read it, what the heck is wrong with you? Oh honey, this one. This one is a book that is going to stand the test of time. This is one that our grandkids are going to read. It’s a heartbreaking, yet beautiful coming of age story about Kya, the marsh girl, who is so much more than meets the eye. Find it here.

    The Guests on South Battery by Karen White

    I was finally able to get a little caught up on the Tradd Street series by Karen White. If you’ve read any of my previous book recommendations, you know I love a well written ghost story that isn’t cheesy. Karen White has always done a phenomenal job at doing just that with this series and The Guests on South Battery was no exception. As with other books in this series, there’s an old house in Charleston involved and mysterious folks arriving into town – along with spirits. Find it here.

    Almost Sisters by Joshilyn Jackson

    I’ve read a few different Joshilyn Jackson books over the past year and this was one of my favorites. 30-something year old Leia returns to her aging grandmother’s home to get her affairs in order. Leia stumbles upon a secret her grandmother had kept for a lifetime that will shake not only her to her core, but the small southern town her grandmother’s family helped to build. Find it here.

    Before We Were Yours by Lisa Wingate

    If you love historical fiction, then you are going to eat this book up. This one probably makes it into my top 25 favorite books of all time reading list. It follows the Foss children from Memphis in the late 30’s who are placed illegally into the Tennessee Children’s Home. The children soon realize they must fight not only to stay together, but to stay alive. The book is based on the real-life Georgia Tann scandal. Find it here.

    Commonwealth by Ann Patchett

    This book is set in both California and Virginia, spans five decades and shows just how much impact a chance meeting can have not only on one’s life, but on one’s entire family’s life for lifetimes to come. It’s raw, heartbreaking, but humorous and sweet as well. Find it here.

    The Prince of Tides by Pat Conroy

    I know. I should have read this one long ago, however as many of you know I only discovered Pat Conroy about five years ago. And as any reader of Pat Conroy also knows, his books are deep and moving and sometimes it’s best to space them out. That being said, I don’t think that “deep and moving” is hardly adequate enough for The Prince of Tides. It’s beyond anything else I’ve ever read and is more than a masterpiece. It’s another one that will stand the test of time and is in my top five best books of all time list. The book spans four decades of the Wingo family siblings in the small South Carolina town they were born in. It’s incredibly tragic and beautiful at the same time. There is a movie and it’s a good movie. If you haven’t read the book though, you are missing out. Find it here.

    Nine Lives by Dan Baum

    A fantastic book for anyone who has a special place in their hearts for New Orleans. Dan Baum tells the story of the people of New Orleans through the lives of nine different New Orleanians who have withstood both Hurricane Betsy in the 60’s and Hurricane Katrina. It shows their ultimate courage, strength and how New Orleans will always rise again. Find it here.

    Voodoo Dreams by Jewell Parker Rhodes

    Another one set in New Orleans, this is a fictional story of the one and only, Marie Laveau. If you don’t have an interest in New Orleans or Voodoo culture, you won’t like this. If you do have an interest, you will find it incredibly wild and intriguing. Find it here.

    Southern Spirits by Angie Fox

    Don’t let the cover fool you here. Yes, I thought that cartoon type drawing was super cheesy too, but I was pleasantly surprised when I started reading the book. This one was recommended to me by a friend and I’ve always liked every book she’s recommended to me, but yes, I did doubt her on this one. I shouldn’t have. It was a good one. Once you get started, you’ll find it hard to put down. I think I whizzed through this book in two or three days. It’s set in the south, complete with haunted properties and spirits who are growing dangerous. Find it here.

    Gods in Alabama by Joshilyn Jackson

    Another one by Joshilyn Jackson, this one explores three often hot topics of the south: religion, football and racism. Arlene must return home to Alabama after being away for a decade. She’ll soon discover what she thought happened wasn’t all of what happened. Find it here.

    Jitterbug Perfume by Tom Robbins

    This one came out in the 90’s but it’s a goodie. It was a new book to me and while it took a little while to really get into it and understand what was going on, when I closed the book at the end, it was one of those “How do I go on with my life after reading this book?” It starts in ancient days and goes all the way through present day, well present day in the late 80’s. It’s a riot, but it’s also a testament to the beauty of really living. Find it here.

    Cemetery Road by Greg Illes

    When Greg Iles wrapped up his Natchez Burning trilogy, it was also another moment of “How do I go on?” He came through for me though with Cemetery Road. Set in a small Mississippi town, it packs it all in: corruption, heartbreak, long kept secrets and one man willing to set the record straight. Find it here.

    Now it’s your turn. Hit me with your latest good reads in the comments so I can add them to my own 2020 reading list!

    Still need more books to add to your list? Here’s some of my past reading lists if you’re new around here:

    Latest Good Reads No. 1

    Latest Good Reads No. 2

    Latest Good Reads No. 3

    The Best Southern Books

    More Favorite Southern Books

    The Best Ghosts, Witches and Such Books

  • DIY Indoor Lattice Wall Tutorial

    DIY Indoor Lattice Wall Tutorial

    If you want to make a statement with your next accent wall, then look no further than this DIY indoor lattice wall. Your friends may think you’re crazy at first, but in the end their jaws are gonna drop.

    I had no idea that lattice walls would be such a hot topic, y’all.

    Many of you thought I was crazy. Hell, I kind of thought I was crazy.

    Many folks are seriously worried about how I’m going to clean them. To be honest, I don’t do a lot of cleaning, so there’s that. 😆 Really though, since everyone was so concerned, I put my thoughts on cleaning these at the bottom of this post.

    For me though, I’d been thinking about doing a lattice wall somewhere for quite a while and when the mudroom’s design led that way, I knew it was now or never. Well, probably not really never, we all know I’m a determined soul when it comes to an out-of-the-box decorating idea. I did put green astroturf carpet on a wall after all.

    While lattice walls will never be for everyone, they are most definitely a winner in my heart…

    Indoor Lattice Wall with Bird Wallpaper

    Thinking about working them into your own home? It’s actually a relatively easy feature wall to create….

    This post contains affiliate links for your shopping convenience. Click here to read my full disclosure policy.

    Lattice Accent Wall Tutorial

    Tools and Materials Needed:

    Steps

    Step 1


    Prep Work

    Before installing any lattice, you’ll need to determine what paint color you’ll be doing behind the lattice and paint the wall that color.

    Lattice Accent Wall Tutorial - painting the wall first.

    I had a lot of other colors and prints going on in this space, so I stayed with white-on-white for the walls and lattice. I have seen lattice accent walls that have one color on the wall and another on the lattice and it’s gorgeous. It just wasn’t the right move for this space.

    For reference, I painted my walls Bit of Sugar by Behr and left the white vinyl lattice as-is and both whites worked well together.

    If you’re planning to go with a color other than white for your lattice or if you’re using traditional wood lattice, you’ll also want to paint it first as well.

    Paint any other trim you’ll be installing on the lattice walls now as well – i.e. the single lattice trim pieces, the cap molding, etc.

    Baseboard also needs to be installed along your wall before installing the lattice.

    Finally, go ahead and mark your studs along the wall using a stud finder.

    Step 2

    Now it’s time to put the lattice on the walls! This is actually really easy.

    The lattice panels come in 4′ x 8′ sheets. So, if you’re looking at the sheets horizontally, they are 4′ tall and 8′ long. I did not cut any of the height off my panels. I only cut down the length if need be.

    If you have a wall you are installing the lattice on that is longer than 8′, you should first determine where you want the seam to be where your panels will meet. I had one wall that was longer than 8′. I decided I would make the seam in the middle. I marked the middle and then used my level to draw a line.

    Note: If you will have to use two or more panels on a wall, I highly suggest placing the seams along where a stud is.

    Cut the lattice to length as needed. We used a circular saw for this.

    After drawing your level line, line up one end of the lattice on the line, then attach the lattice to the wall using a nail gun or finish nails and a hammer where you’ve marked your studs.

    Lattice Wall Decor - using vinyl lattice as interior wall molding.

    This is the seam on my long wall where two panels had to meet up. As you can see, there is a gap. Both the walls and floors here are not level, so that was working against me. No big deal though – that gap is easily going to be covered with a single lattice wood strip.

    The lattice should sit right on top of your baseboard, or be pretty close to it as shown below.

    Indoor Lattice Ideas - using it as wall molding.

    Continue installing the lattice panels around the rest of the room.

    Step 3

    Once all the lattice panels are installed, it’s time to make it look finished with your moldings.

    DIY Indoor Lattice Wall - installing a molding cap on top of the lattice.

    You’ll want to install the molding cap above the lattice before installing the single lattice pieces to cover seams and corners.

    We used this molding which has a lip on it so it smoothly sits right over the top of the lattice.

    Step 4

    Cut the single pieces of lattice molding to size and install those in corners, edges and panels seams.

    Lattice Accent Wall Tutorial - using single lattice moldings to cover the edges.

    This helps to give the lattice a framed-in and finished look.

    Step 5

    Fill any nail holes in the lattice and trim with spackling putty and touch up with paint as needed.

    Lattice Wall Decor Ideas - used as wall moldings in a colorful mudroom.

    Console Table / Similar Red Mirror

    I think this lattice wall decor brings gorgeous dimension and interest to a space.

    Lattice Ideas - using lattice as wainscoting.

    Wallpaper / Pink Door Color / Light Fixture / Similar Brass Chinese Symbols

    Keeping it white-on-white also complemented the other colors, patterns and designs in this space without having the walls take away from the overall feel of the room.

    DIY Lattice Accent Wall in a mudroom

    Green Tassel / Similar Brass Ginger Jars / Similar Blue and White Jars

    And I adore how it’s the perfect backdrop for decorative accents like these and that red mirror.

    And for those of you super worried about cleaning: since it was such a concern on this Facebook post, I tested out my Swiffer duster on them and that thing easily gets in all the nooks and crannies. The fact that I used the vinyl lattice panels which are thinner than traditional wood panels was key there too, I think.

    So….would you do it? Could you handle lattice on your walls? 😬

    Take the full tour of the mudroom featuring this lattice wall here!

    Want more great accent wall ideas?

    Washed Out Stripes Accent Wall – all you need is a sample pot of paint!

    7 Wall Treatments that Aren’t Shiplap – for all of us who haven’t jumped on that train….

    Black and White Gallery Wall Around the TV – makes your television disappear!

    DIY Wood Panel Wainscoting – super cheap way to bring wood tones and architectural interest into your home!

    Want to come back to this lattice idea later? Just pin the image below!

    Indoor Lattice Wall Tutorial with bird wallpaper.

    Stay up to date on social media:

    Facebook | Instagram | Pinterest | Twitter

  • Bright and Colorful Mudroom Reveal

    Bright and Colorful Mudroom Reveal

    A bright and colorful DIY mudroom makeover that brings the outside in! Featuring gorgeous lattice walls, bird wallpaper, pink and green hues and more!

    While J. Lo worked her scantily clad 50 year old rockin’ body during the Super Bowl halftime, my 34 year old body, clothed in dirty sweats and embellished with numerous traces of paint, was sprawled out on the sofa engorging myself on chocolate ice cream.

    Nope, not even J. Lo’s miraculous self-preservation could inspire me to put the ice cream down. It probably should have inspired me to not give myself such large scoops at least, but there was cause to celebrate.

    And it wasn’t the game on television.

    It was the completed mudroom…

    This post contains affiliate links for your shopping convenience. Click here to read my full disclosure policy.

    Y’all, it has been a crazy last couple of weeks. With all the delays I had on items getting here, Grunt and I worked nearly round the clock over the last week to get everything done in here on time. There is NO way this space would have ever been completed without him helping me out. He stepped in and installed the flooring, then took it upon himself to take on the moldings after that, went round and round with a light fixture and more. Thanks boo. ❤️

    If you don’t remember what this space looked like before, here’s a little reminder.

    Yikes. See more of the before pics here.

    Now this space is bright, fresh and feels a thousand times bigger! Let’s take a tour shall we?

    Select Surfaces Engineered Vinyl Plank Flooring in Chocolate Oak

    One of the first things we did was install flooring in this space. We used Select Surfaces engineered vinyl plank flooring throughout the room. Getting rid of that old linoleum and putting this in laid the groundwork (literally!) for a fresh new space that can hold up to all our family’s shenanigans as well. Read more on the flooring and how we installed it here.

    Green Bamboo Trellis Fabric

    The cabinets got a huge makeover. You may have noticed in the before image that these cabinet doors had funky little holes in them. Well, that “design” has made me frown ever since we moved in here. I had the centers of the cabinet doors cut out, gave them all a fresh coat of Bit of Sugar, then installed fabric to the backs of the doors to cover the openings. I used this bamboo trellis fabric from Spoonflower to do the job. It coordinates nicely with the wallpaper and packs a fun punch of pattern and color.

    Polished Nickel Acrylic Cabinet Knob / Stainless Steel Cabinet Hinges / Lotus Silk Tassel

    All the cabinets got new knobs and hinges as well. I wanted to go with a clean, polished finish for this space so I opted for polished nickel finishes. I used these acrylic cabinet knobs to compliment the bamboo fabric on the doors. To keep everything on this side from being too green, I hung one of SmithHonig’s gorgeous silk tassels on one knob.

    Bamboo Roman Shade

    This side also got a fun little addition in the form of a window reading seat for the Circus! This little area has always been here, but before we would just use it as storage for our grocery bags and things like that. When I had some of the bamboo fabric leftover, it hit me that this would make the perfect little window seat for my best girl. She thinks it’s super cool to climb up there away from the rest of the house. We also installed this bamboo roman shade here as well. It’s a simple pull down-push up shade, so the Circus can easily operate it herself.

    Exterior Door / Pink Paint Color

    As you may remember from last week, we installed a new, solid door in this space, which was much needed. I opted to give the door a pop of color, Bubble Shell by Behr to be exact. I found the Chinese symbol at a thrift store a while back. It means “long life.” I thought it was a nice little compliment to the door.

    Paige Semi-Flush Mount Polished Nickel Light

    New lighting! These sure beat the bare bulb fixtures we were working with, eh? I wanted lights in here that were shiny and pretty, but that also wouldn’t take away from the gorgeous wallpaper and other patterns I was putting in this space. These semi-flush mounts were the perfect answer and they give us loads more light in here than the old ones did! Now I can actually see in my cabinets when I’m rummaging through them looking for something!

    Milton and King Hawthorn Wallpaper

    Speaking of wallpaper, what do you think of it? Sometimes I think I can actually hear the birds just singing off the walls. haha! This wallpaper from Milton & King was the jumping off point for the entire space. I fell for it first and then worked everything else around it. Its beautiful bird pattern brings the outside in and always makes for a sunny day inside even if it’s raining out. While the install for wallpaper does take time, it’s well worth it for the outcome you get!

    Lattice Panels

    Ahhh, the controversial lattice walls. Did you see my Facebook post about this? You either love it, hate it, or you’re really worried about cleaning it. 😂 While this was not the original plan, I LOVE that we did it! We used vinyl lattice panels for this project and I have to say, it’s one of the more easier wall treatments I’ve ever done. The full tutorial for the lattice walls is here. P.S. I’m not that worried about cleaning it. Since it’s vinyl rather than wood, it’s a lot thinner than traditional lattice. My Swiffer dust easily gets in those nooks and crannies.

    Liberty Hardware Polished Nickel Wall Hooks

    Along this wall, we also added in a few of these polished nickel wall hooks for easy hanging storage. No mudroom is complete without a few hooks for hanging coats and bags, right?

    SmithHonig Felt Tote Bag

    I’ve got my felt tote bag from SmithHonig hanging on one now. This tote is great for just about everything. It has great little compartments inside to keep everything organized as well – no more digging around!

    Six Panel Room Divider

    On the opposite end of the door is this little area. This space was originally the garage before previous owners added on. Thus, part of our heating unit and water heater are located in this room. I used this room divider to hide those, but still make them easily accessible if need be.

    Velvet Finishes Cosmopolitan Paint / Pink Trellis Fabric / Umbrella Holder

    I took an old credenza I had and made it into a bench. It offers more storage and a place to sit down and put on / take off shoes. I wanted to keep some of the stained wood look on this piece to coordinate with the roman shades in the space, so instead of painting the entire thing I just painted parts of it in this light green hue from Velvet Finishes – so easy to do, only took a couple coats and I was done! I upholstered a piece of plywood with this pink trellis fabric from Spoonflower to create the bench top.

    Console Table

    Turning the corner from the long lattice wall is this little nook. I wanted to have a drop zone for mail, keys, etc., so this little wall was prime real estate for a small console table to do just that. Seeing as how there’s lots of pattern and color going on in the space, this simple white one with clean lines worked perfectly. I did add the knobs to give it a glam little touch.

    Do you recognize that mirror? It used to hang in the Circus’ bathroom before she got an upgrade. I always liked the look of it, so I hung onto it. I gave it a glossy coat of red spray paint and I love how it works in here. Hubba hubba!

    I found this brass bowl at a yard sale for $3 and it’s going to be perfect for mail!

    SmithHonig Courtyard Silk Tassel

    On the opposite end of the table, I mixed in a little blue and white decor along with a touch of brass and another SmithHonig tassel in Courtyard – these kick anything up a notch!

    Faux Fiddle Leaf Fig / Blue and White Fishbowl Planter

    And last but not least, to give this space even more of an outside feel, I added in a faux fiddle leaf fig in a pretty blue and white fishbowl planter. My last two fiddle leaf figs haven’t fared too well so I decided to invest in a good lookin’ faux one.

    And that’s a wrap for this space! Tell me what you think about it in the comments below!

    Don’t miss the rest of the gorgeous room reveals today!

    Click the links below to see!

    Casa Watkins Living // The Boho Abode // Delineate Your Dwelling // Haneen’s Haven // The Happy Housie // Homemade by Carmona // House by Hoff // Jeweled Interiors // Kaleidoscope Living // Our Fifth House // PMQ for 2 // Rain on a Tin Roof // Southern State of Mind // Taryn Whiteaker // This is Our Bliss // Thou Swell // Up To Date Interiors

    A huge thank you to all our sponsors for the New Year New Room Challenge!

  • Mudroom Progress: The Home Stretch

    Mudroom Progress: The Home Stretch

    If you came here today expecting the big reveal of the mudroom makeover, I’m sorry to disappoint you.

    Originally, today was supposed to be reveal day. But most of us gals had delays in receiving products for our spaces, so we’ve pushed the reveal back to next Tuesday. I’m still waiting on two things to arrive I need myself for this makeover.

    This post contains affiliate links for your shopping convenience. Click here to read my full disclosure policy.

    This past week has seen some decent progress though!

    Walls Painted and Prepped for Wallpaper

    All the walls going solid white and the portion of walls where molding will be have been painted a crisp white, specifically Bit of Sugar by Behr. I used a semi-gloss finish in their Marquee paint. If the name sounds familiar, it’s because I’ve used this white countless times. It’s my go-to, true crisp white. The semi-gloss finish will hold up to any rough and tumbleness that finds it way through this part of the house as well.

    While you can’t really tell, the upper half of the walls, which will get clothed in this beautiful wallpaper, have also been prepped using this wallpaper primer. I cannot wait to get that paper up!

    Trim and Moldings Partially Installed

    Wait for it….

    I’m putting lattice on the walls.

    I’ve went rogue, ya’ll. This was not part of the original plan. Originally, I had planned on putting a traditional board and batten style wall treatment along part of the walls. However, the more I thought about it, the more I felt like that was too farmhouse feeling and just didn’t go with the feel of the rest of my design plans – see those here. And then the more I kept thinking about it, the more lattice walls kept coming to mind. I have oohed and ahhed over interior lattice walls (like these) for quite a while now. And so I figured “Why not?! Let’s just do it!” And I did. And I love it so far. Are you team lattice? 😬

    As you can tell, the rest of the flooring has also been installed – read more about it here – and the hubs came home after working at the farm Sunday and took it upon himself to knock out all my baseboard in this space, which was a huge help to me.

    New Door

    The old door in here was just a hollow core, run-of-the-mill basic door. It needed to be switched out years ago when we first moved in as it was a huge energy loss (in terms of heat and air) for our house. Dollars literally going straight out the door. Of course, we just never got around to it until now. We still have to add a threshold and some weatherstripping to really lock that heat and air inside, but I’m so happy to finally have this little part of the project crossed off the list and it was only about a $125 fix! The door also got a nice coat of Bit of Sugar.

    I’ll be going full-force in here over the next week to get it all done! Follow me on Instagram for updates!

    A big thanks to our sponsors for this challenge!

    Be sure to see what all the other girls are up to as well:

    Casa Watkins Living // The Boho Abode // Delineate Your Dwelling // Haneen’s Haven // The Happy Housie // Homemade by Carmona // House by Hoff // Jeweled Interiors // Kaleidoscope Living // Our Fifth House // PMQ for 2 // Rain on a Tin Roof // Southern State of Mind // Taryn Whiteaker // This is Our Bliss // Thou Swell // Up To Date Interiors